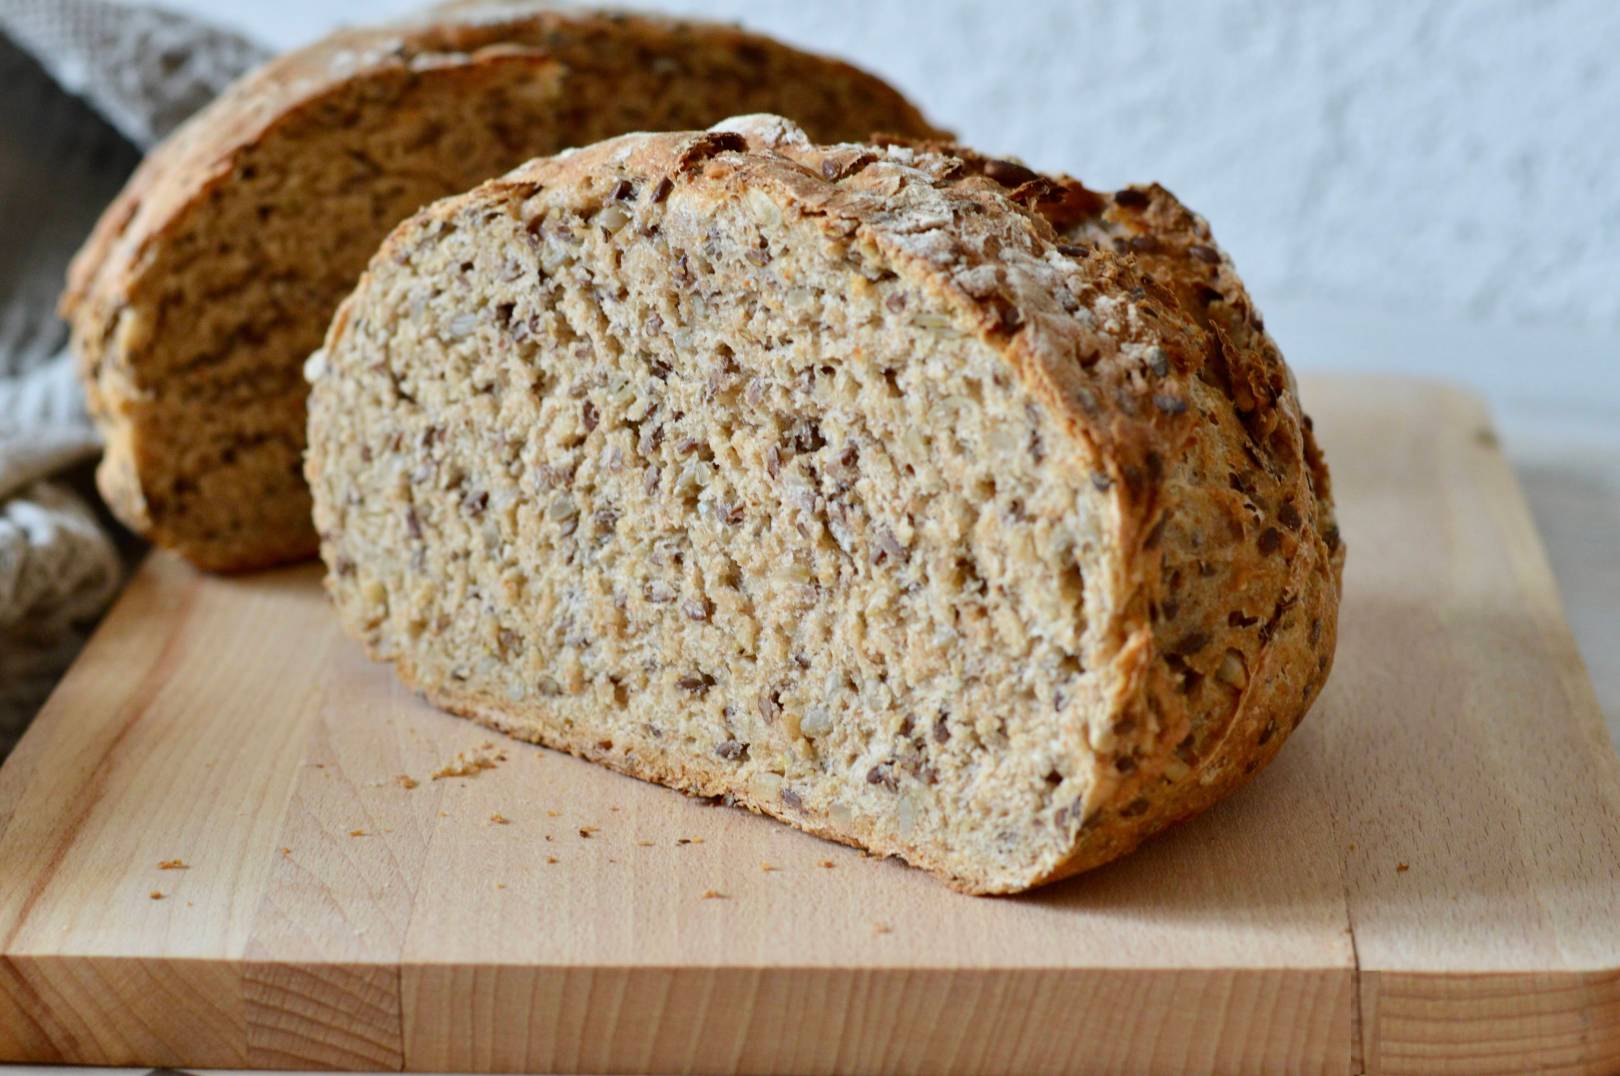
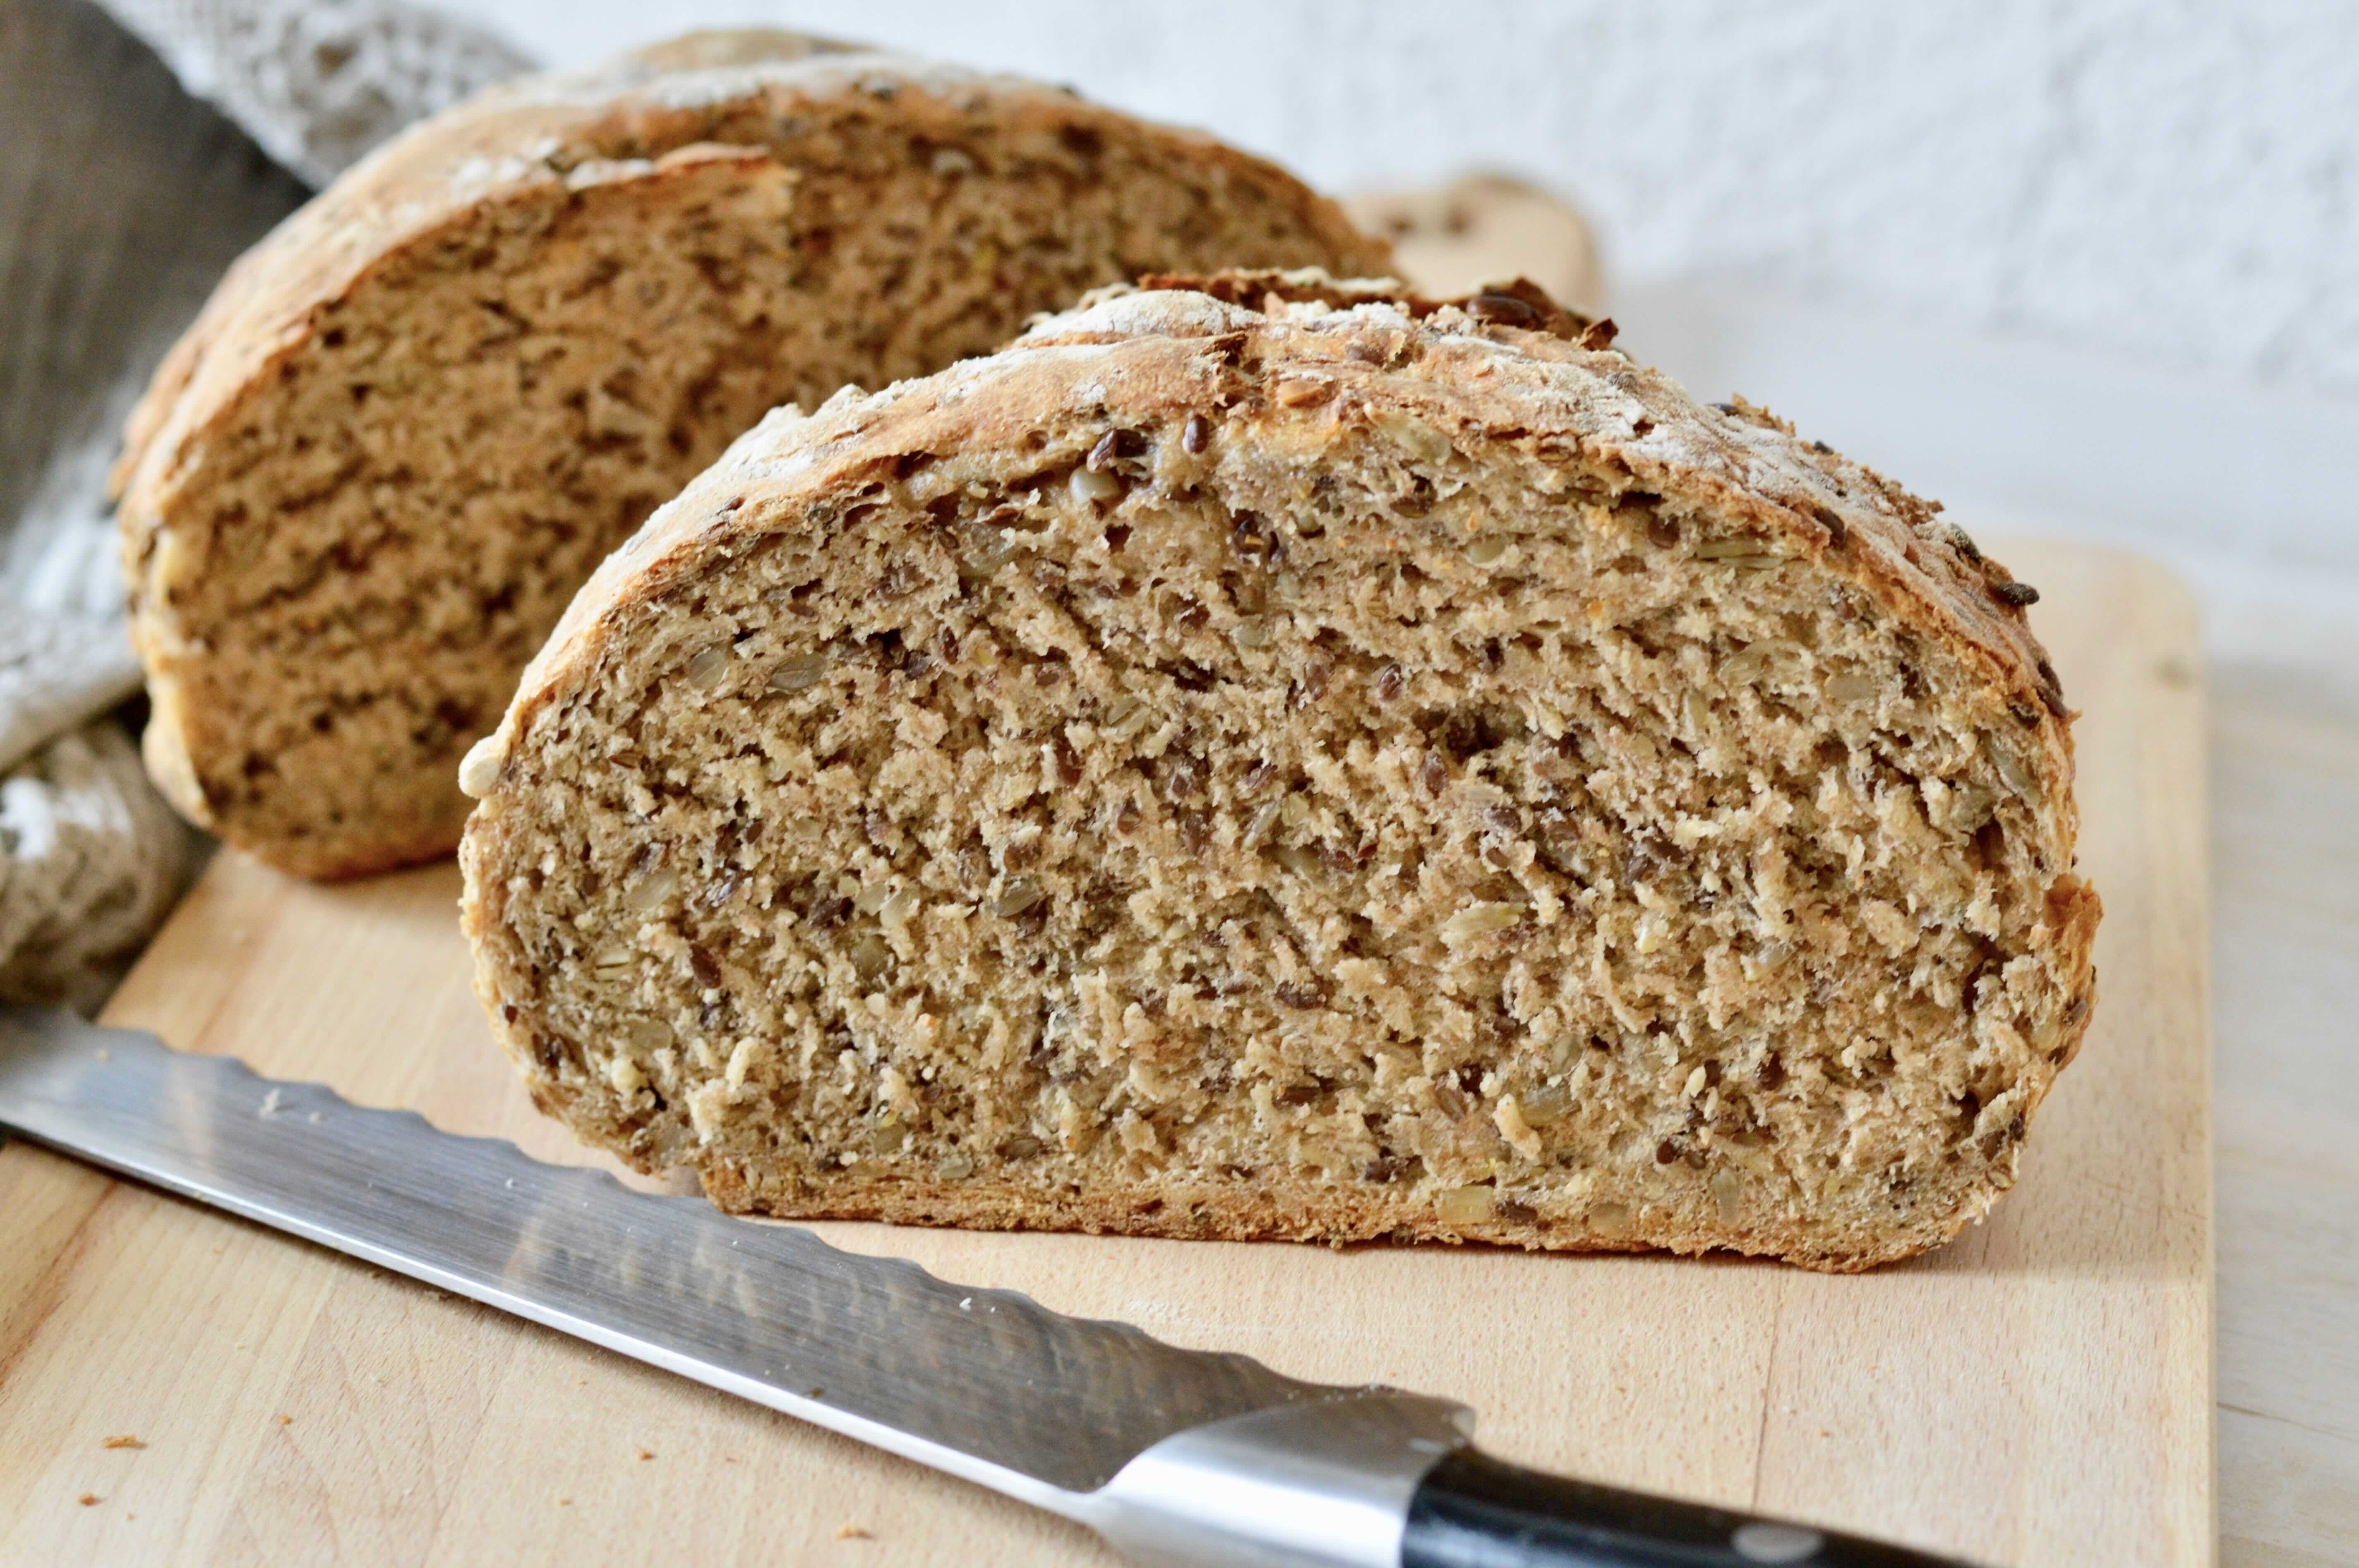
This hearty one-pot artisan bread follows the same method as my cranberry pecan yoghurt bread, but swaps in a nutritious blend of flax seeds, sunflower seeds and rolled oats. The result is equally perfect!
Made with a combination of whole and white flours, this seedy loaf is packed with fiber, protein and nutrients. While the recipe itself is straightforward, the key to success lies in patience – allowing the dough to rise slowly, preferably overnight for 12 to 18 hours. This extended fermentation gives the yeast time to develop complex flavours while the flour develops its gluten structure.
The addition of yoghurt in this recipe creates a delightful sourdough-like texture, offering a clever shortcut that bypasses the days or weeks needed to develop a traditional sourdough starter. You’ll still achieve that wonderfully complex taste without the extended commitment.
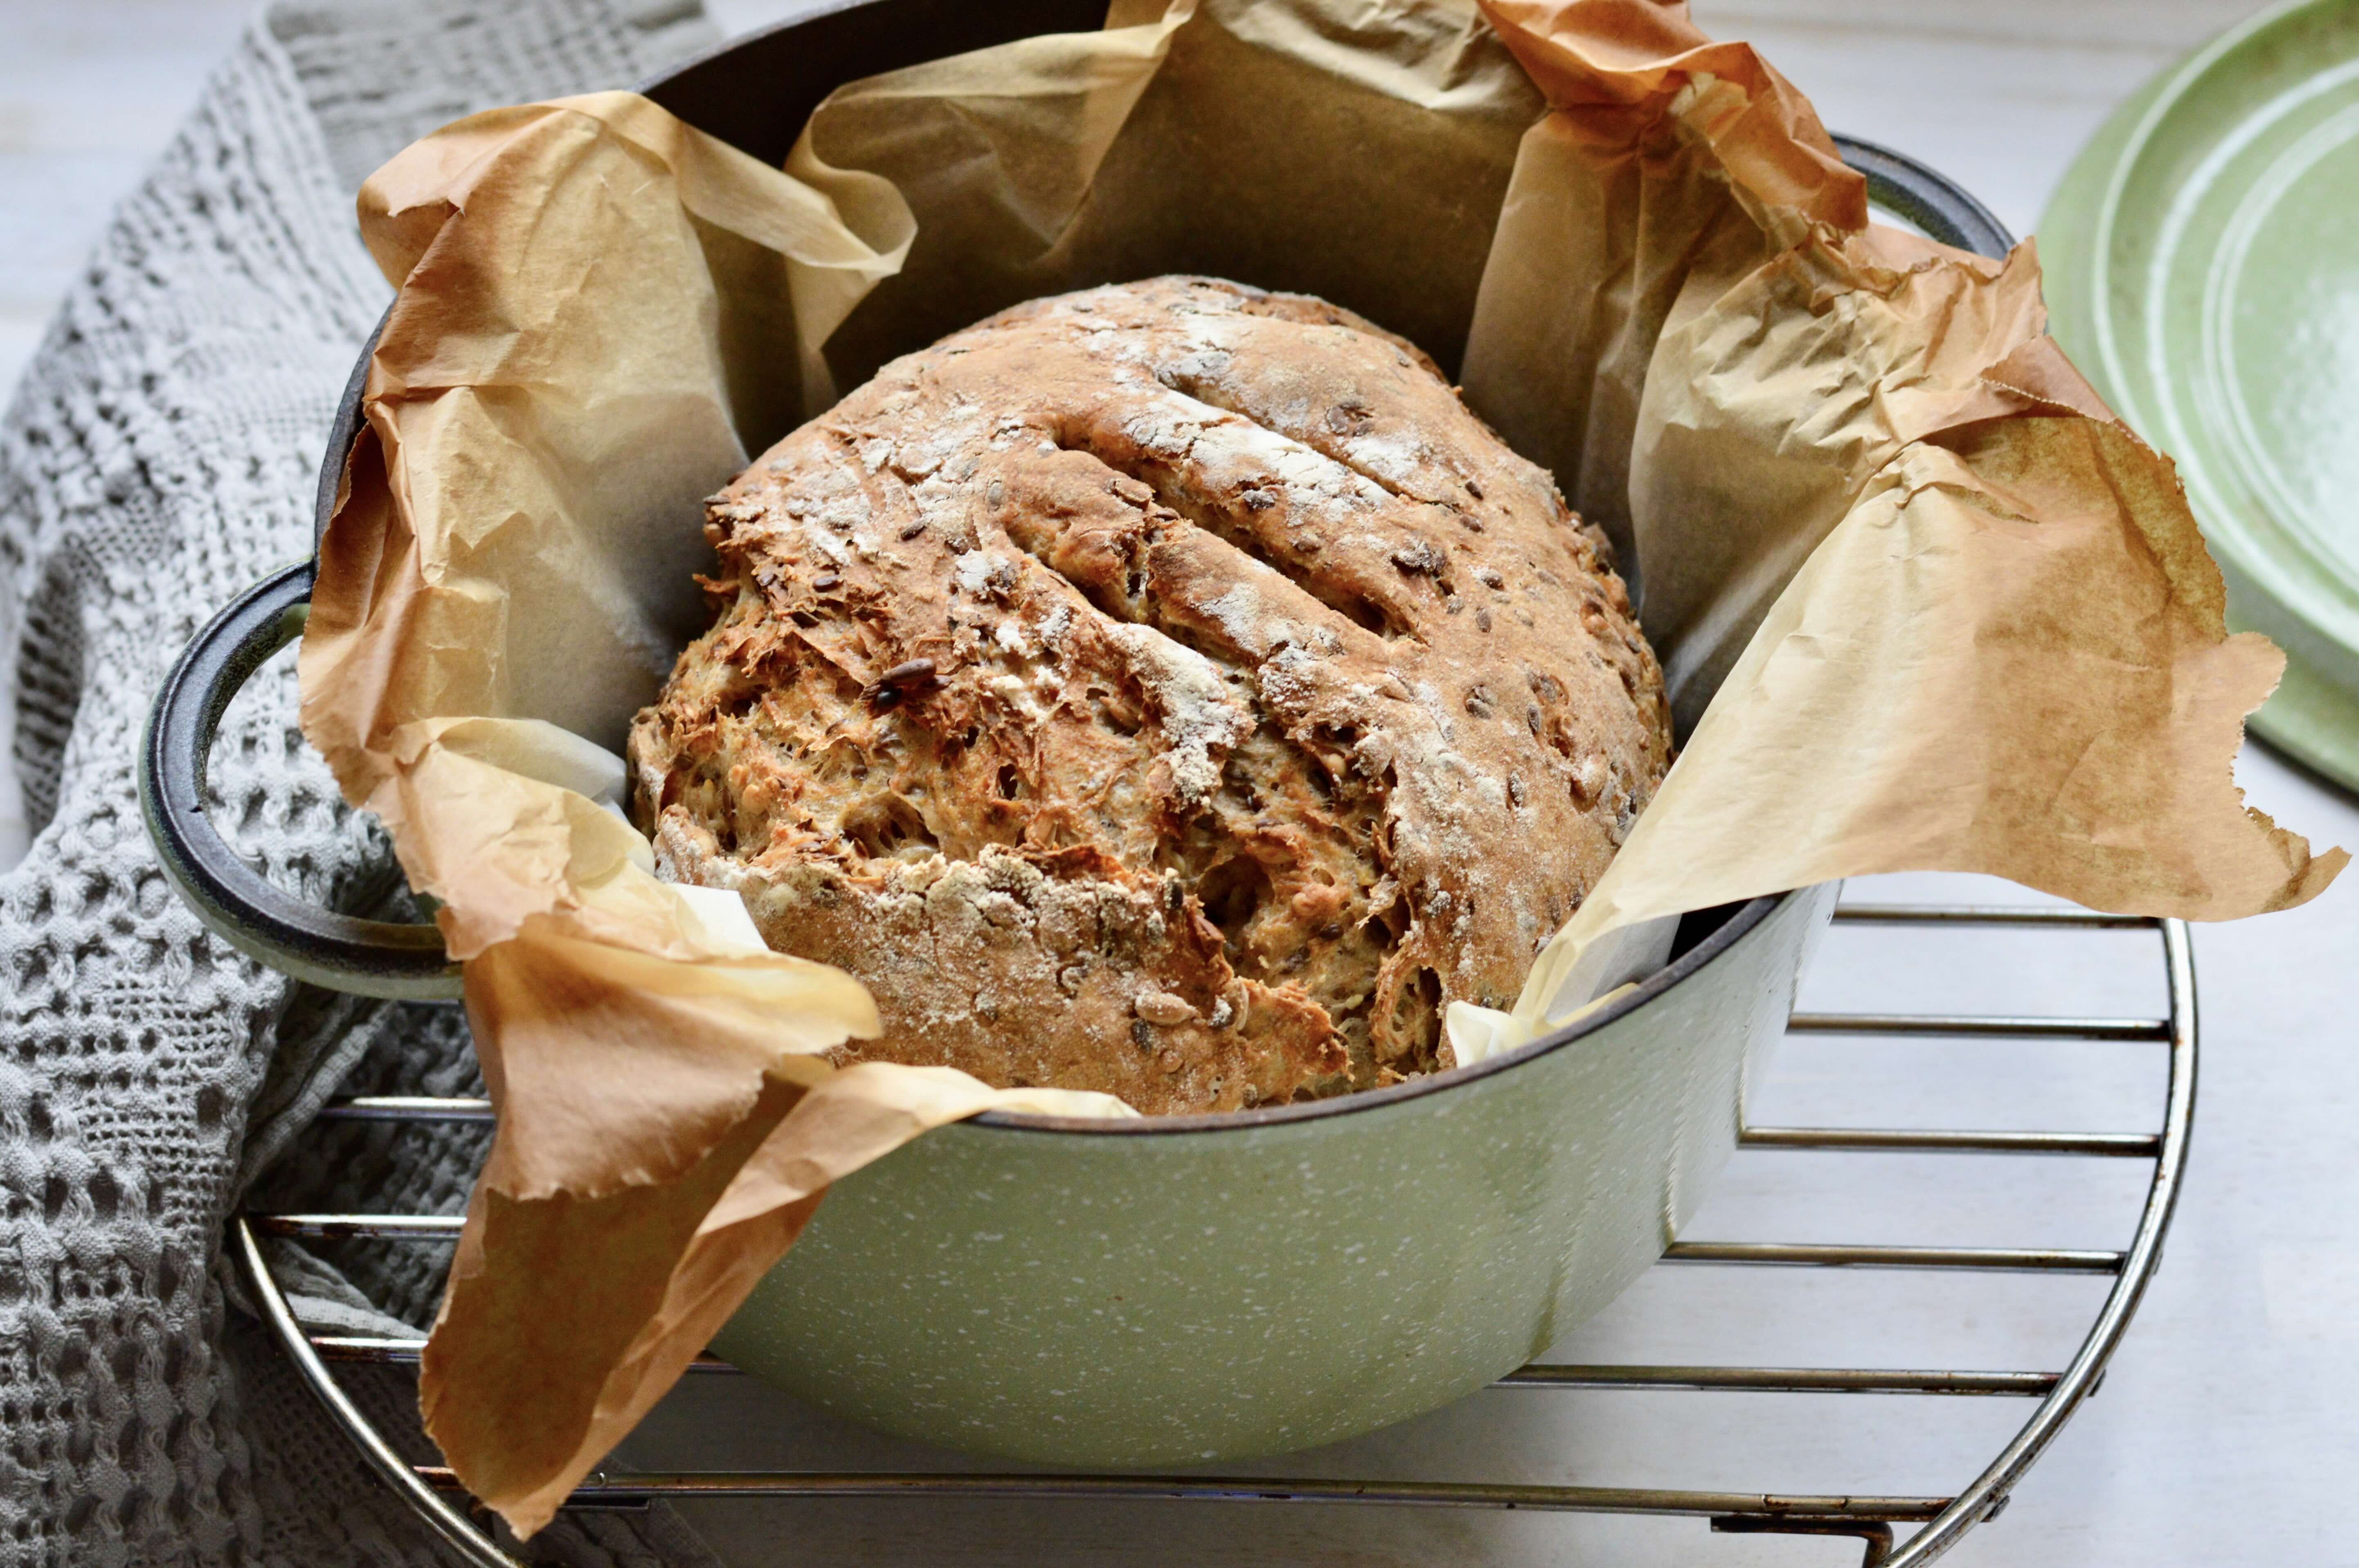
Although many no-knead breads are made in a Dutch oven, this particular dough incorporating yoghurt calls for some light manipulation. By folding and stretching the dough several times, you’ll create the optimal gluten structure for a loaf that balances a delicate crumb with a satisfyingly crunchy crust. I’ve included a quick demonstration of these techniques in the video below.
Follow the step-by-step recipe with pictures below to create your own loaf.
Artisan Seed, Oat and Yoghurt Bread

Equipment: An oven-proof Dutch oven or cast-iron pot with lid. Mixing bowls. A metal or bread spatula. A food scale.
INGREDIENTS
- 3 cups flour (432 gr): 11/2 cups white bread flour or All Purpose + 11/2 cups whole wheat *(see notes)
- 2 teaspoon (tsp) salt
- 1 cup seeds & rolled oats (I used 56 gr raw sunflower seeds; 60 gr flax seeds; 40 gr oats) *(see notes)
- 1/2 tsp (2 gr) dry active yeast (levure sèche) or 1 tsp (4 gr) crumbled fresh yeast yeast
- 11/4 cups (300 ml) lukewarm water (not hot/not cold)
- 1 tablespoon (20 gr) liquid honey or maple syrup
- 1/4 cup (65 gr) plain full fat Greek yoghurt *(see notes)
- A small amount of additional flour for shaping the dough

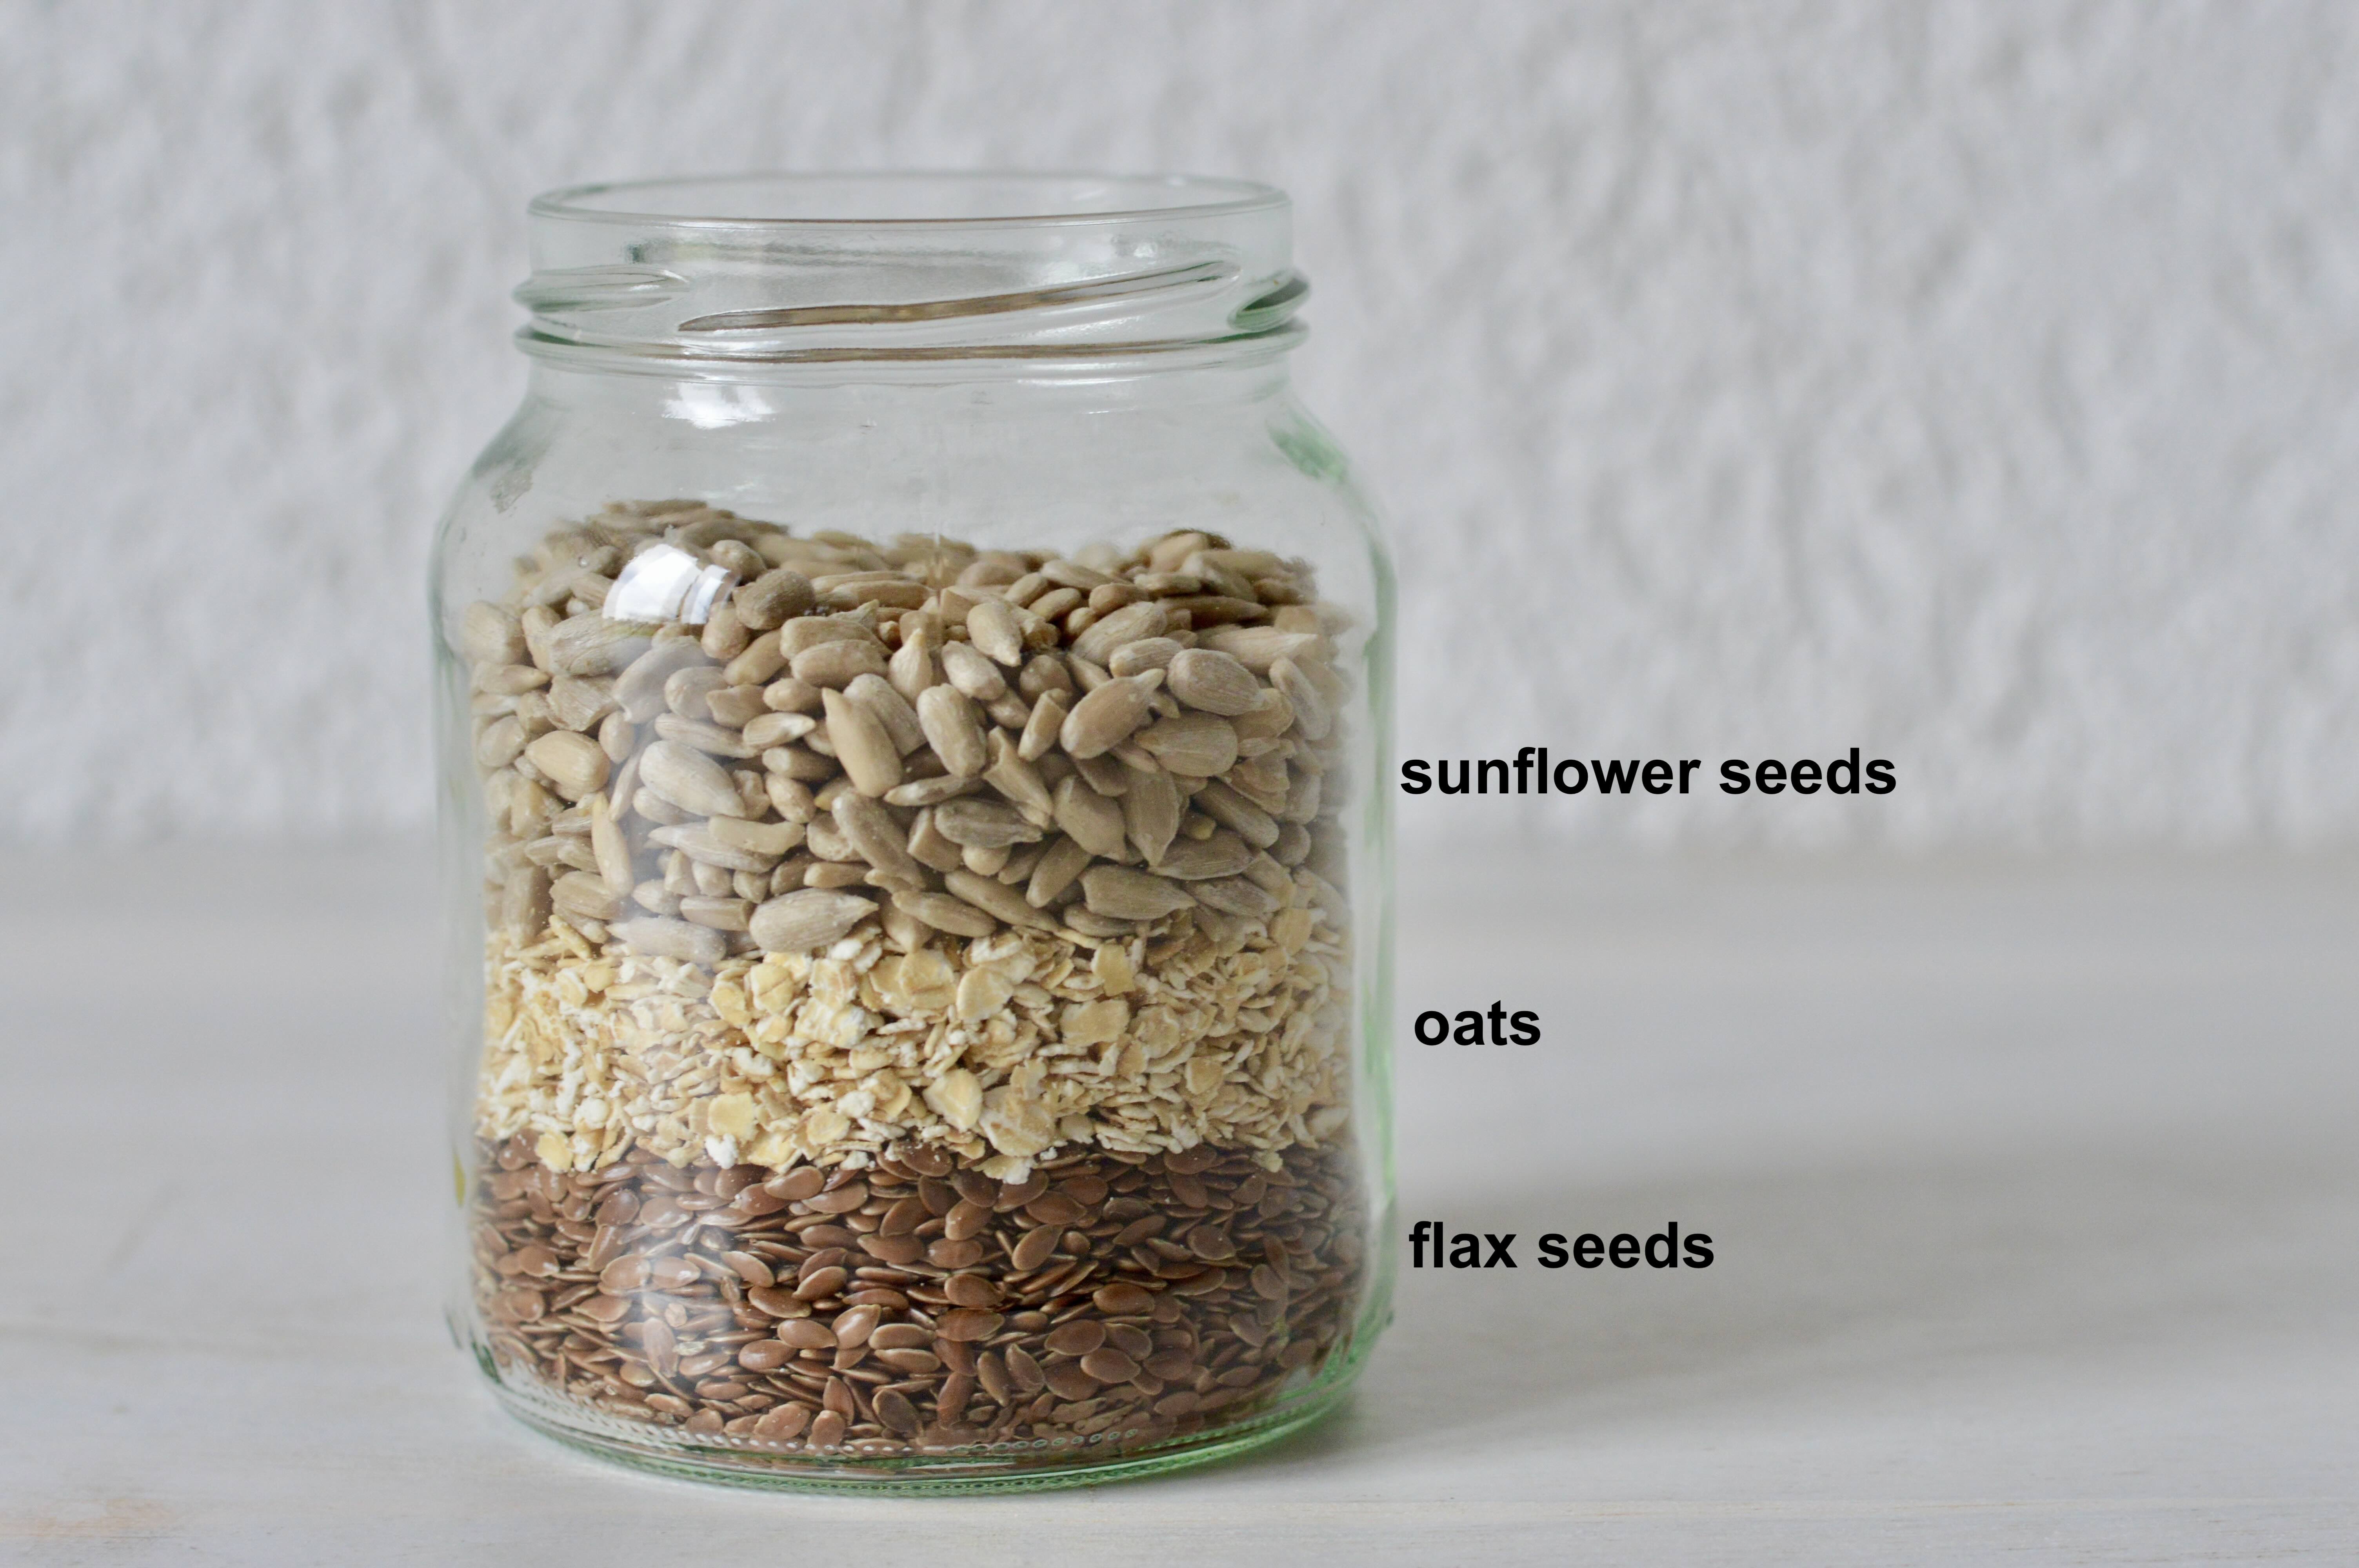
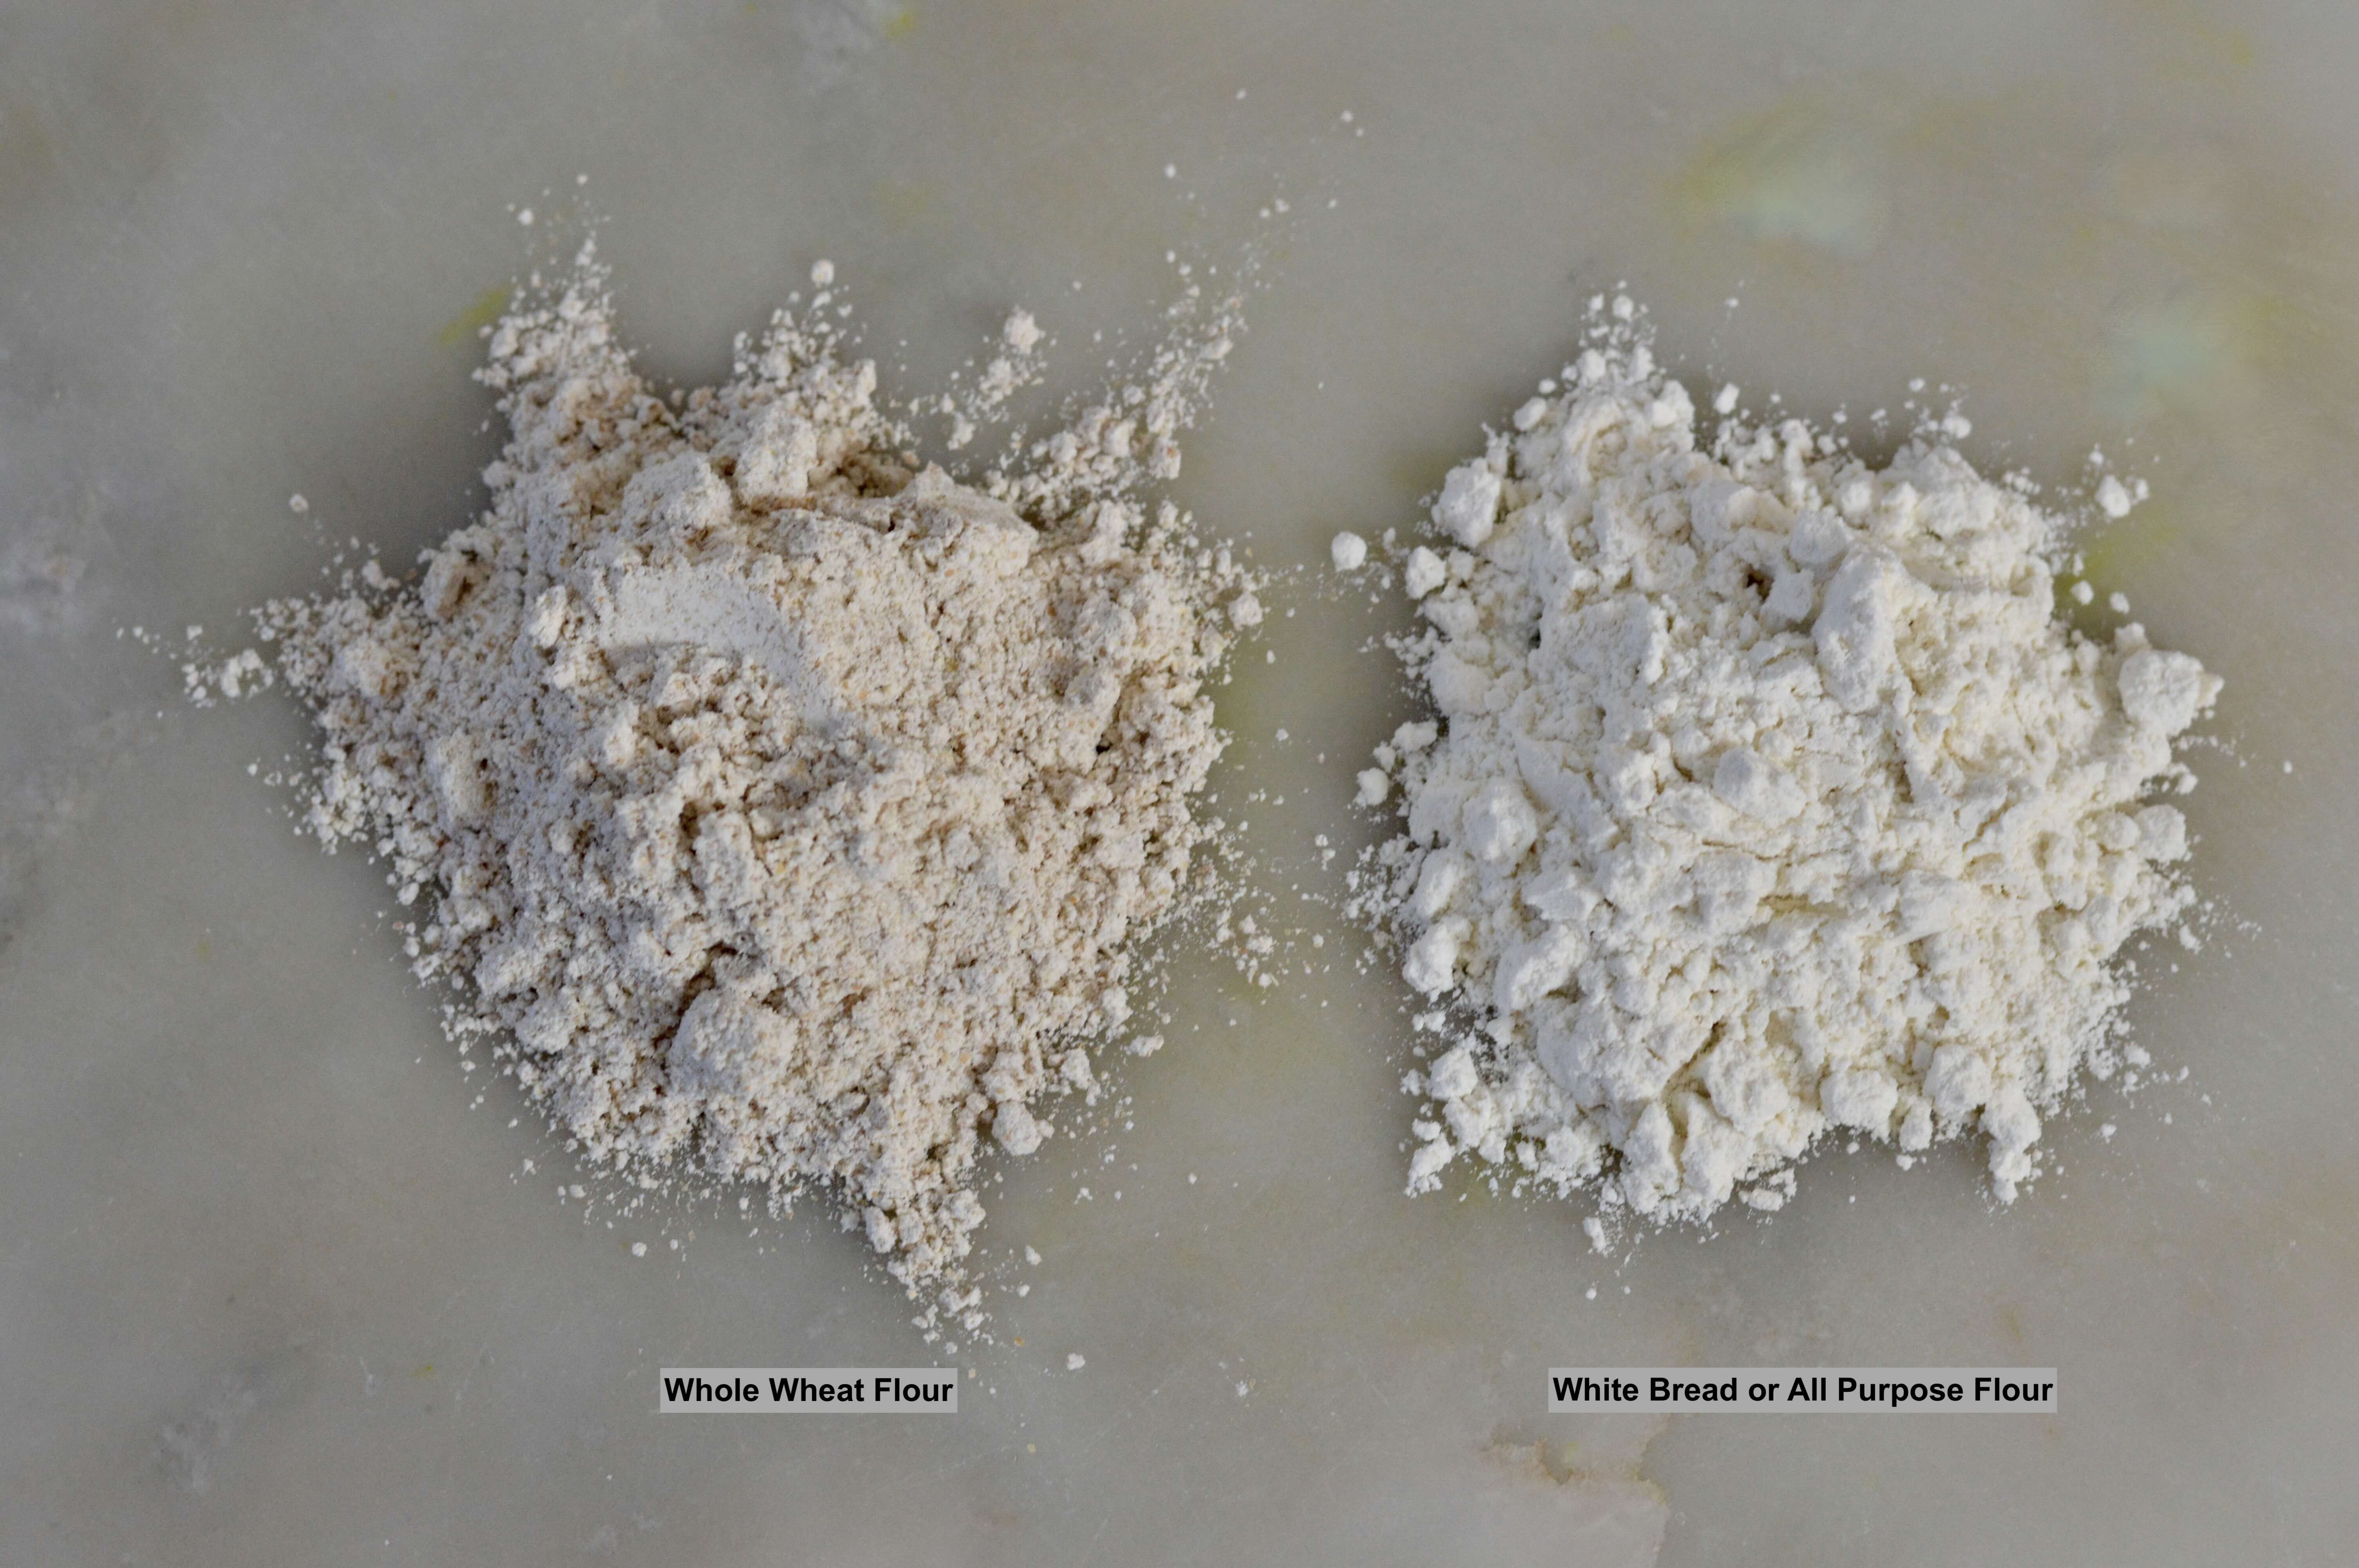
* Notes: For the flours, always aerate and mix the flour before measuring and weighing. I recommend that you weigh the flour and not only measure it in cups. You should have a total of 432 grams of mixed white and whole wheat flour. Please use unbleached white flour. For the oats, sunflower and flax seeds, I added 1/3 cup of each to make 1 full cup. If you prefer, you can omit the oats and use only seeds or other types of seeds (e.g. pumpkin, hemp hearts). For the Greek yoghurt, check the expiry date on the packaging (it has to be fresh) and make sure it contains live cultures or probiotics (e.g. Lactobacillus bulgaricus and Streptococcus thermophilus). I haven’t tried this recipe with reduced fat (e.g. Skyr) or with plant-based Greek yoghurt (e.g. Soy based), but these could work just as well.
PROCEDURE
Oven: 230C / 450F (heating starts at Step 3)
Step 1: Make the dough
In a big bowl, mix together with fork the flours, salt, seeds and oats.
In separate medium bowl, add the yeast. Pour the water on top of the yeast and mix with fork until yeast dissolves completely. Then add the liquid honey and mix until it dissolves completely. Then add the yoghurt and stir/mix until combined.

Transfer the wet mixture into the dry flour mixture. Turn and fold with wooden spoon or spatula until the dry and wet ingredients are combined. Particularly, check the bottom of the bowl to combine the dry ingredients that can deposit. The mixture should be shaggy, moist and sticky.

Form into a ball, as much as possible (you can also use your hands). Cover the bowl with a dry/clean tea towel topped with a lid or a big plate.

Step 2: First and second rise and shaping the dough
Place the covered bowl with the dough ball in a dry area and let the ball rise for 12 to 18 hours at room temperature.
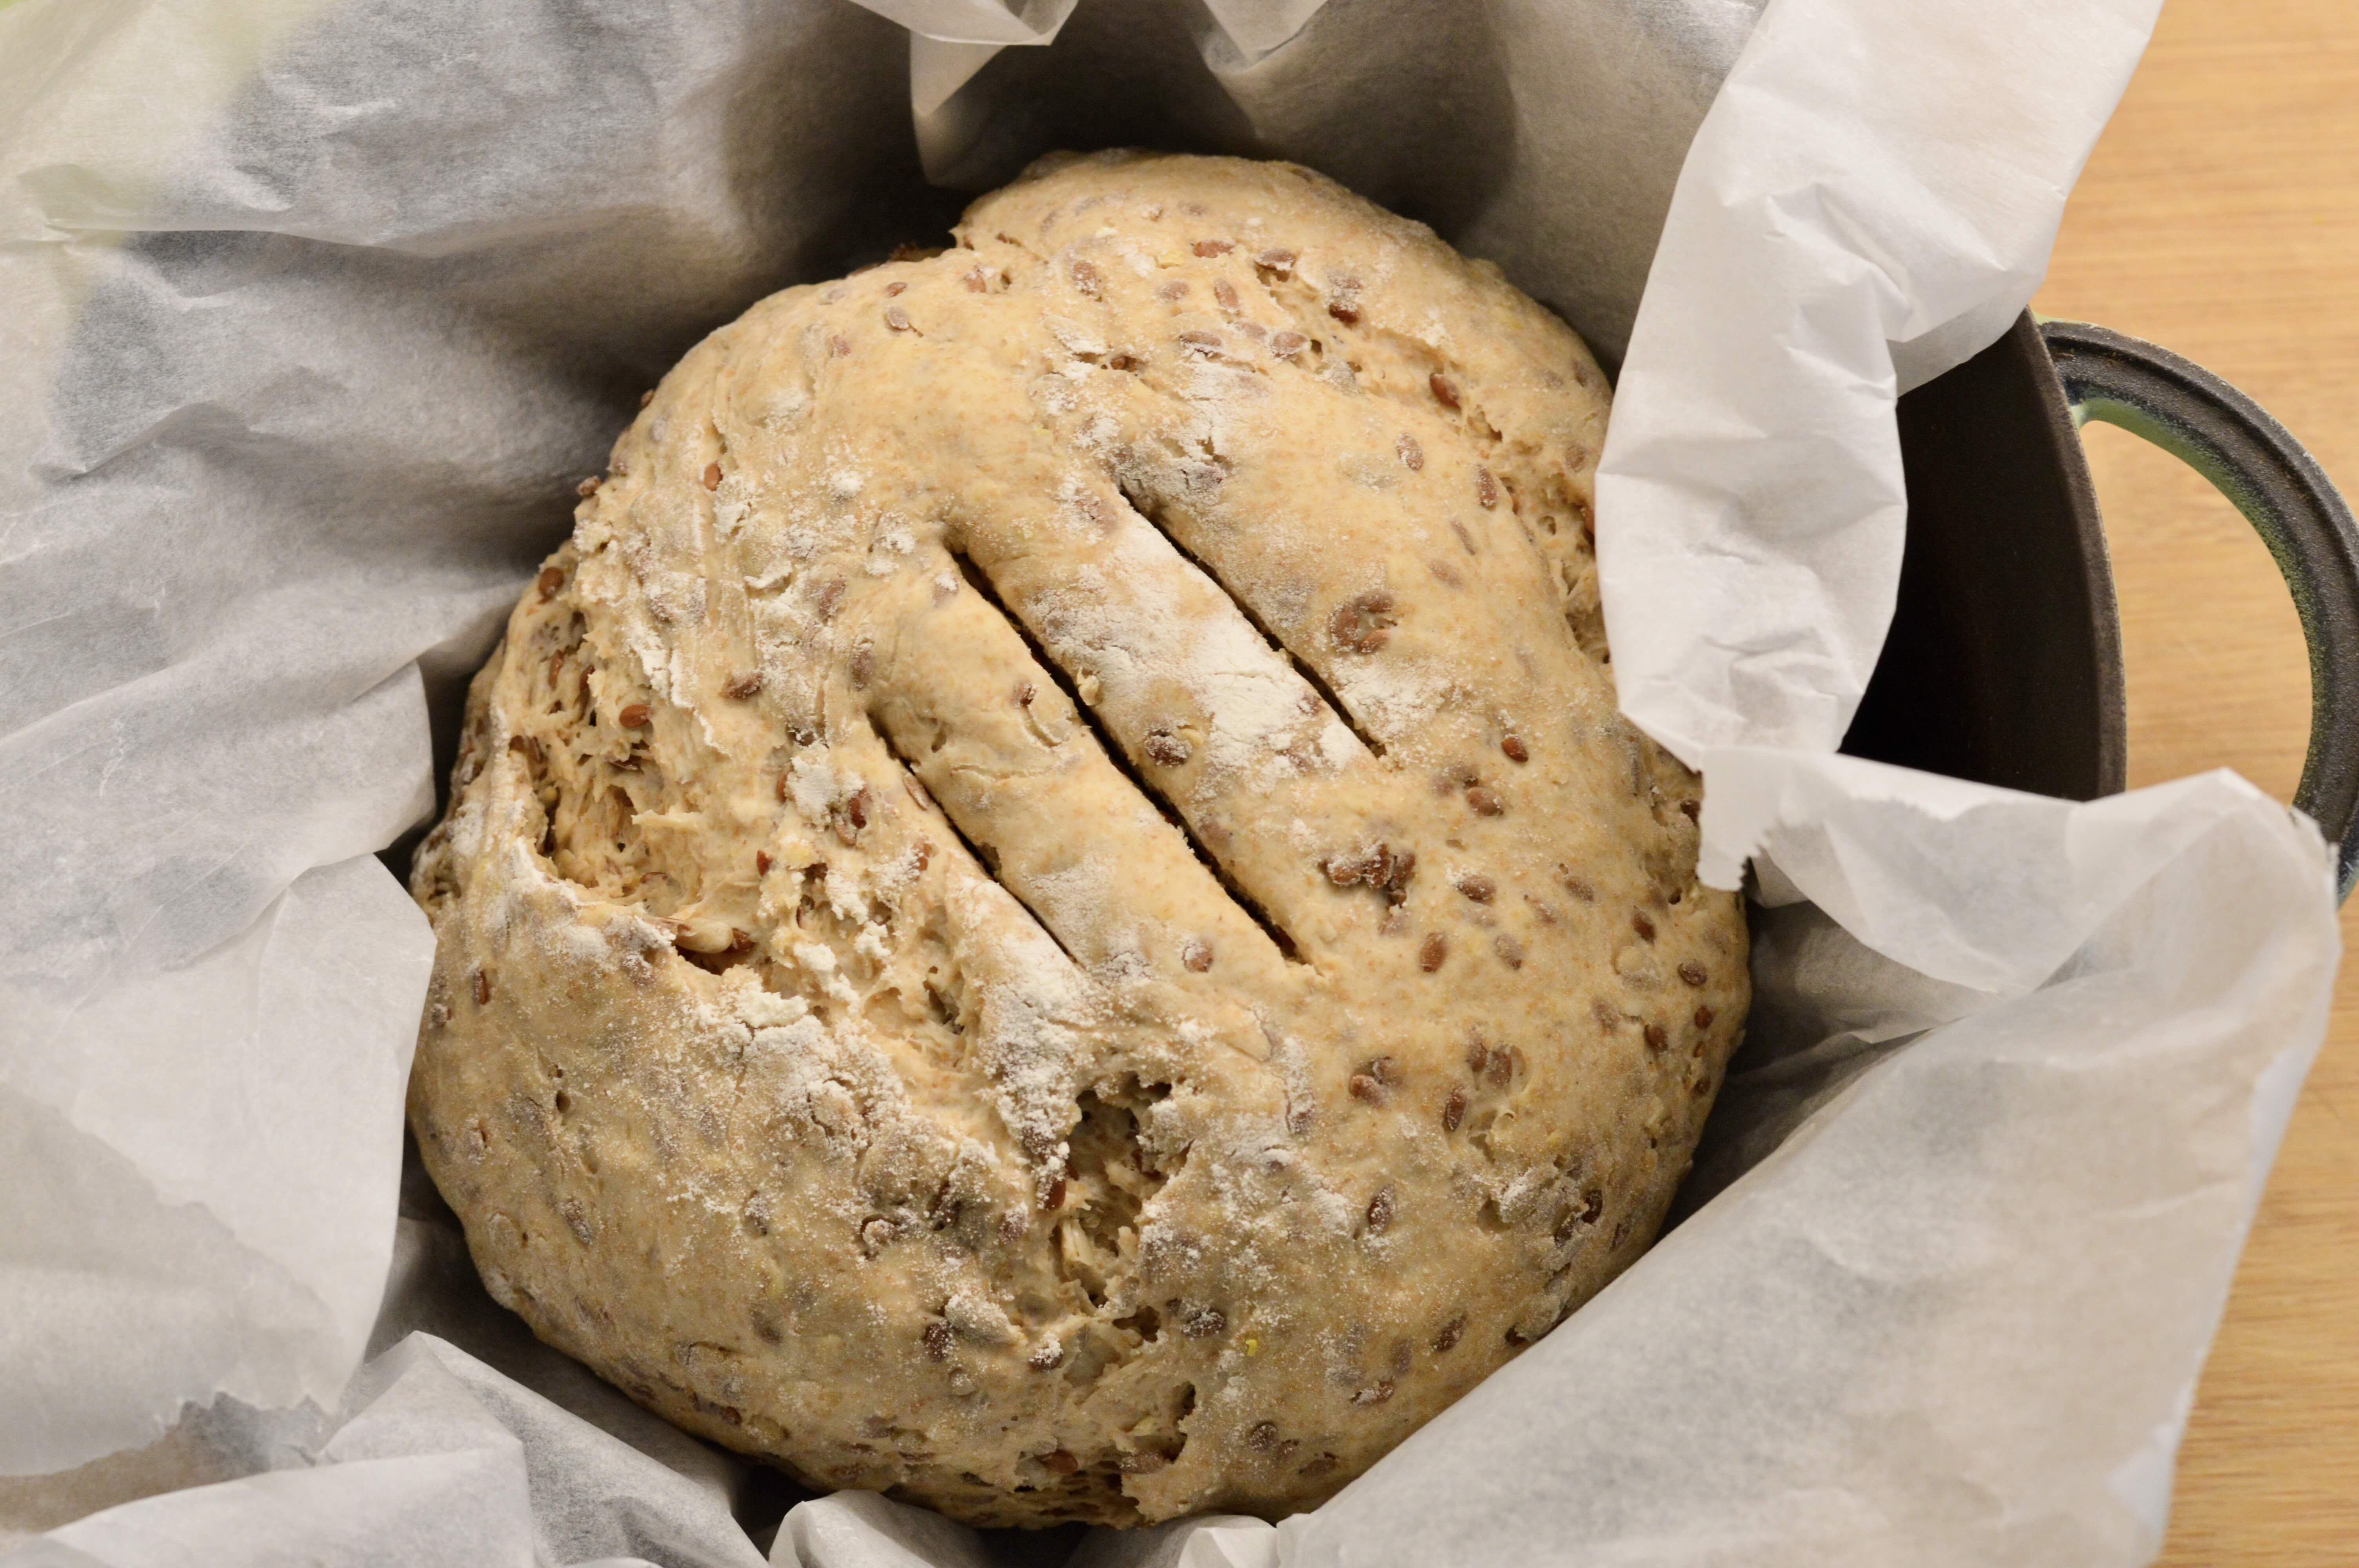
After the first rise, spread some flour on a hard surface. With a metal or bread spatula, scrape out the edges of the dough and transfer the mixture onto the floured surface. Sprinkle some flour on the surface of the dough and with floured hands, lightly knead by: folding the dough followed by stretching it with your hand palm pressing downwards and outwards. Repeat this a few times until a soft ball forms— “a boule”. Sprinkle some flour on the dough when it feels too moist and sticky.
Transfer the boule onto a big piece of parchment paper. Then, grab the parchment ends and place it into a clean dry bowl, keeping the parchment underneath. Dust the top with a bit of flour. Cover with dry/clean tea towel and let the boule rise for 11/2 hours.

Step 3: Preheat the oven and cast iron pot with lid.
After the second rise, heat your oven at 230C / 450F and place the oven-proof pot with lid in the oven. Let the pot heat up for 30 minutes — it has to be very hot.
Step 4: Bake the bread
After 30 minutes, take out the very hot pot with lid and place it on a heat proof or wooden surface. Grab the boule by the parchment paper and place it into the hot pot (being careful not to burn your hands or wrists). Make a few small slits on top of the boule using the tip of a sharp knife or a bread razor (this prevents the dough ball from exploding in the hot oven). Cover with the hot lid.
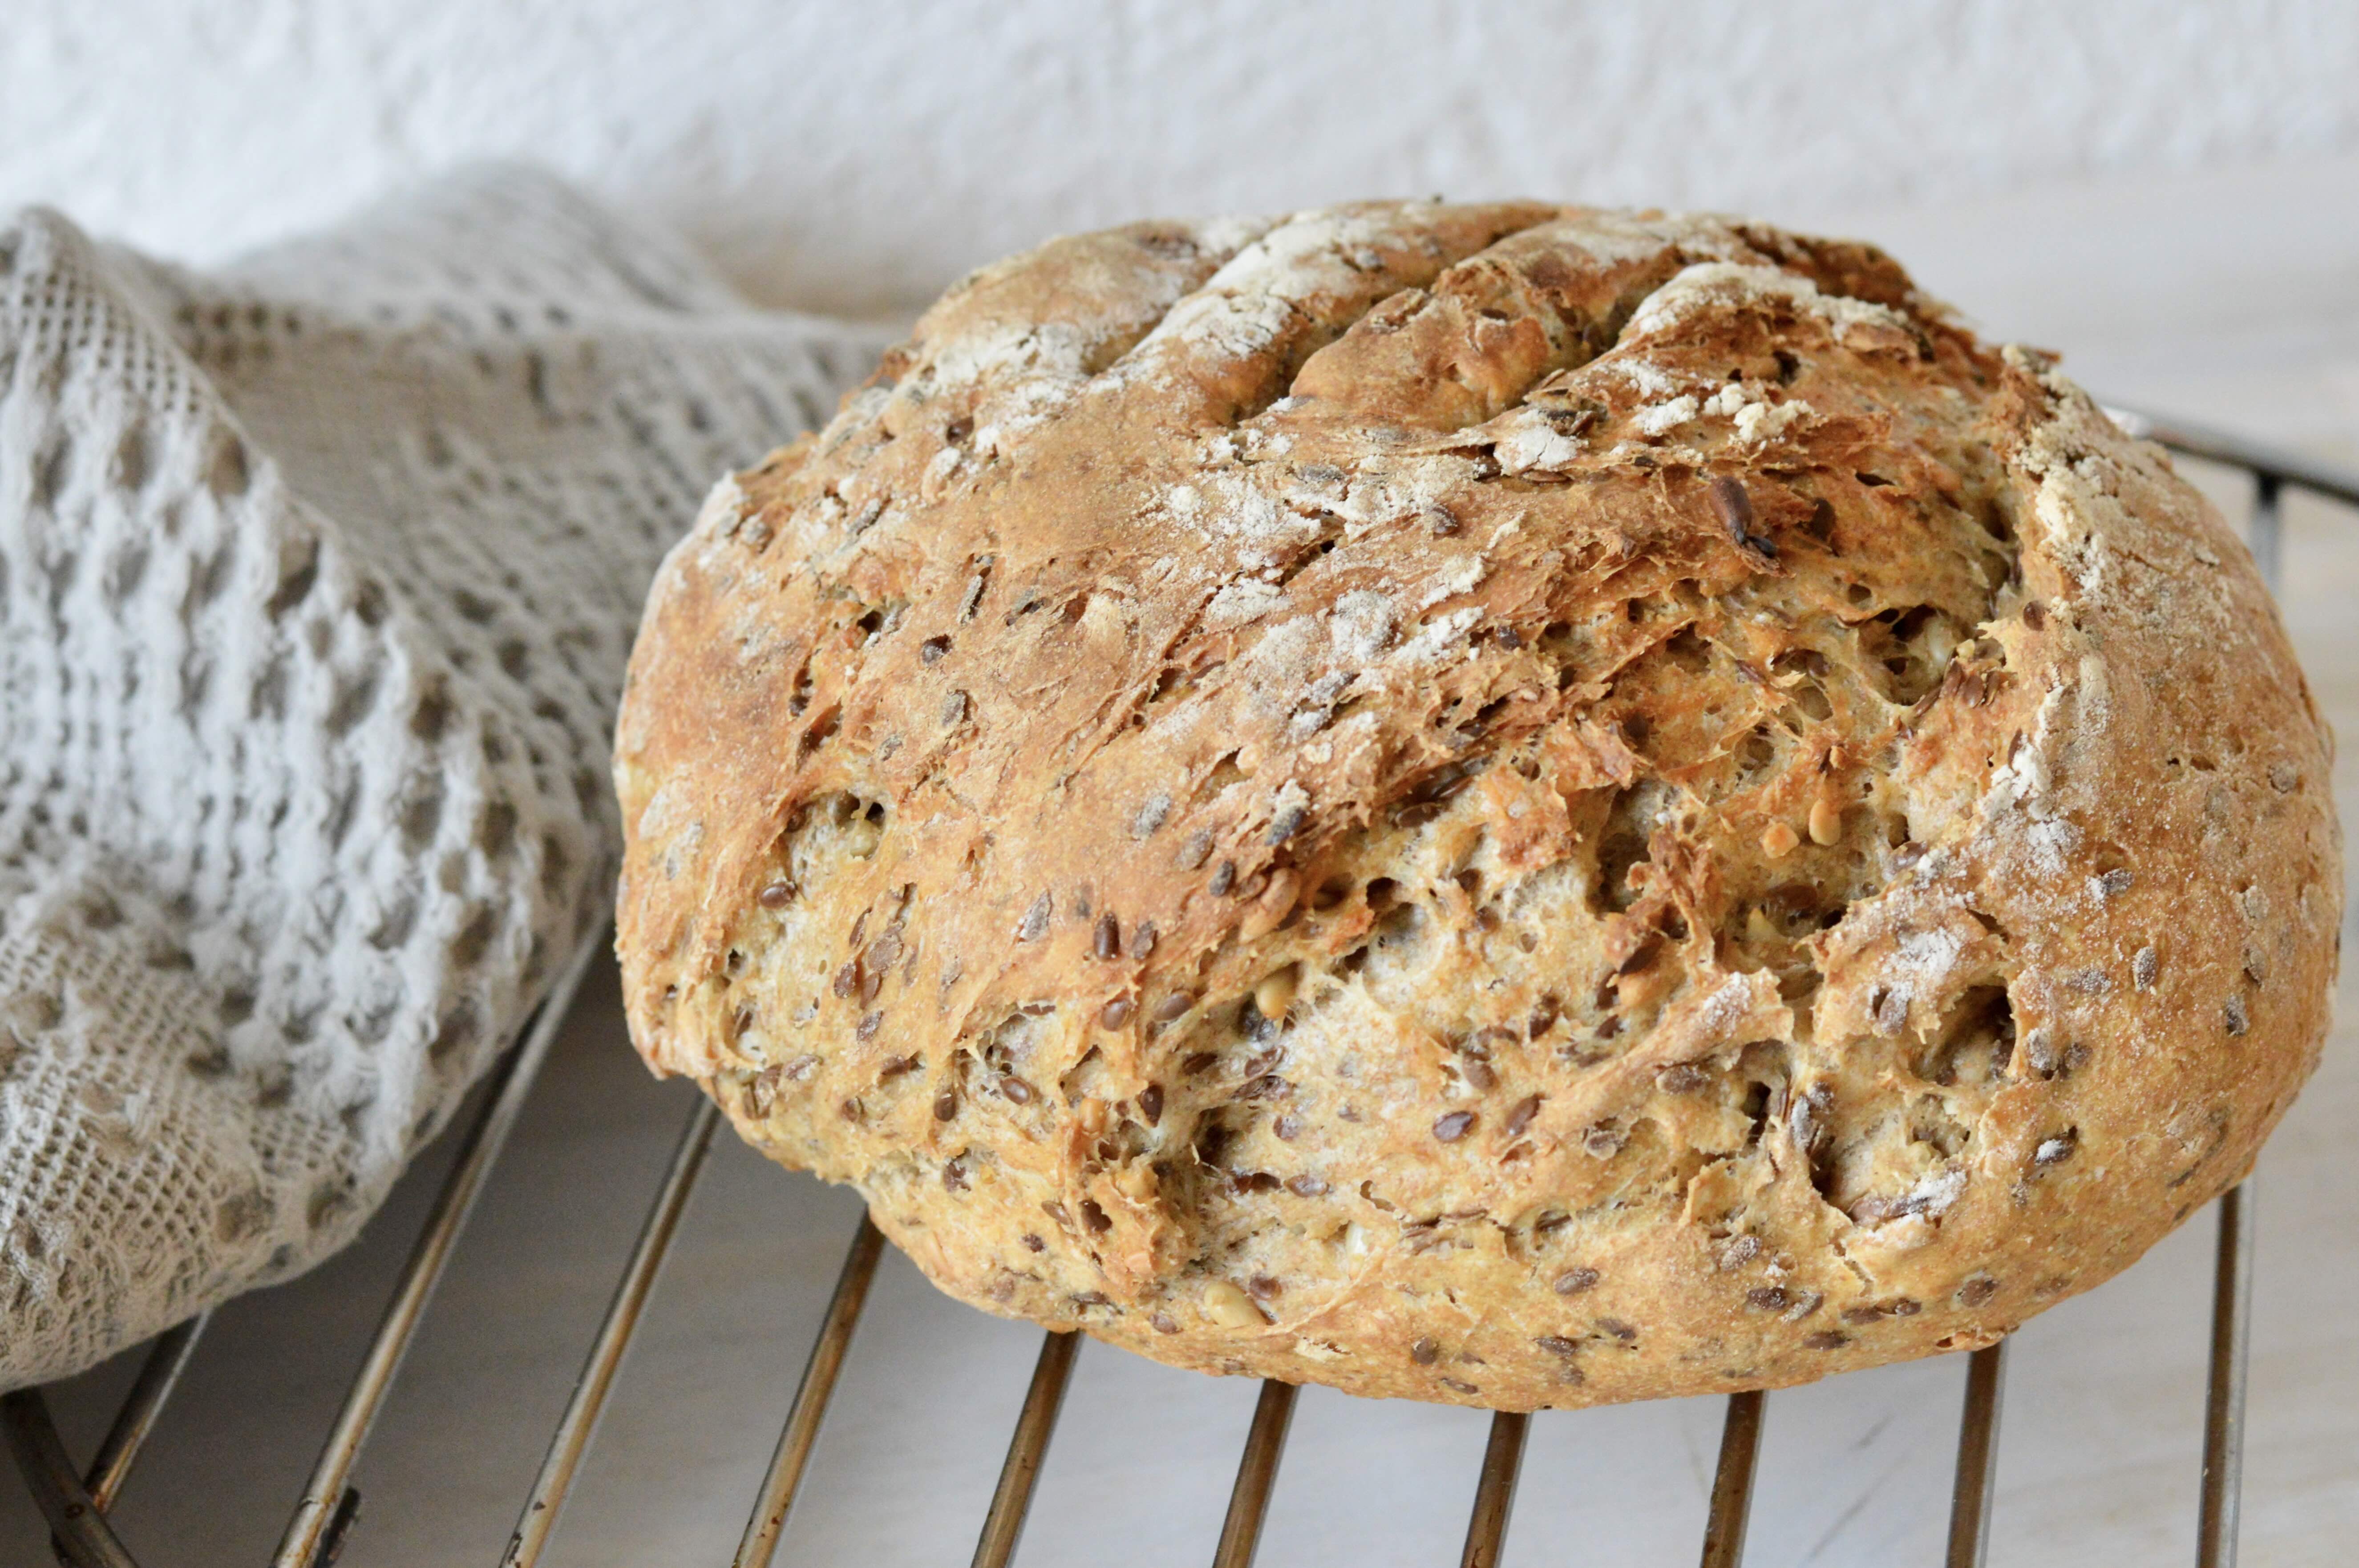
Place this in the heated oven on the mid-lower rack and bake covered for 30 minutes. Then remove the lid and allow to bake for another 8-10 minutes or until the outside of the bread is brown and crusty looking.
Step 5: Let the bread cool
When done, let the bread cool on a rack as it is still coming together while hot. Slice and enjoy while slightly warm or as soon as it is cool enough to handle.


Wrap leftover bread with a clean tea towel and store in a container or bag at room temperature or in refrigerator. It keeps for several days and longer in the refrigerator. You can also freeze the bread. I often store half of the loaf in a freezer bag.
This bread has a shorter shelf-life than store-bought because there are no preservatives, chemicals or additives in it.

Enjoy!
