
Ice cream may not be at the top of the health food list, but as an occasional treat, it’s fine! Eaten alone or with cake or pie, ice cream can be enjoyed all year round. And, when you make your own, your ice cream has much less sugar and preservatives than commercial brands. You know what’s in it and it’s also less expensive.
After various attempts to come up with a “healthy” plant-based version with wholesome ingredients such as soy milk, rolled oats and raw cashews, this recipe was the winner. For a creamy ice cream, it needs a certain amount of fat, including some saturated fat.
I added equal parts of full fat coconut milk and oat milk, the latter of which contains zero saturated fat. I also added raw cashew butter, which contains heart-healthy unsaturated fats, and a small amount of cacao butter (15 g) to give it a hint of chocolate flavour and richness.
As for the taste, I cannot detect either the coconut milk or the cashew butter or oat milk. When these ingredients merge together, the final result is vanilla ice cream.
Ice cream stabilisers
For the stabilisers, I read that combining locust bean powder and guar gum in small amounts yields the best results when making ice cream. In this recipe, you only need 1/2 tsp (1 gram) of locust bean powder and 1/4 tsp (0.5 gram) of guar gum. Together, these react to reduce ice crystals and produce a smoother, silkier texture with a slower meltdown.
Locust bean powder, is also known as carob bean flour because it is made from the seeds of the Carob Tree. It is also labelled as E410 and is the best ice cream stabiliser for reducing ice crystals.
Guar gum is from the seeds of the guar plant, which is a legume. It is also labelled as E412. Guar doesn’t reduce ice crystals as much as locust bean, but acts as an emulsifier and gives the ice cream thickness, bounce and body.
I admit that it can be confusing because we often refer to ingredients with E numbers as “bad chemicals or additives” but when it comes to stabilisers, such as these ones, most are natural. Locust bean and guar gum are natural powders available in natural food stores.
For that ultimate creamy texture, I also read that you can add lecithin powder. Some sites even recommend dextrose powder. However, I wanted to keep it all as simple and as natural as possible and decided to omit these two ingredients.
Should you want to make an outstanding plant-based French vanilla ice cream without coconut milk, check out this one by Thomas Pagot. Thomas is very talented. He even makes his own plant-based cheese. I was inspired by Thomas when I was working on this recipe.
So the outcome is this:
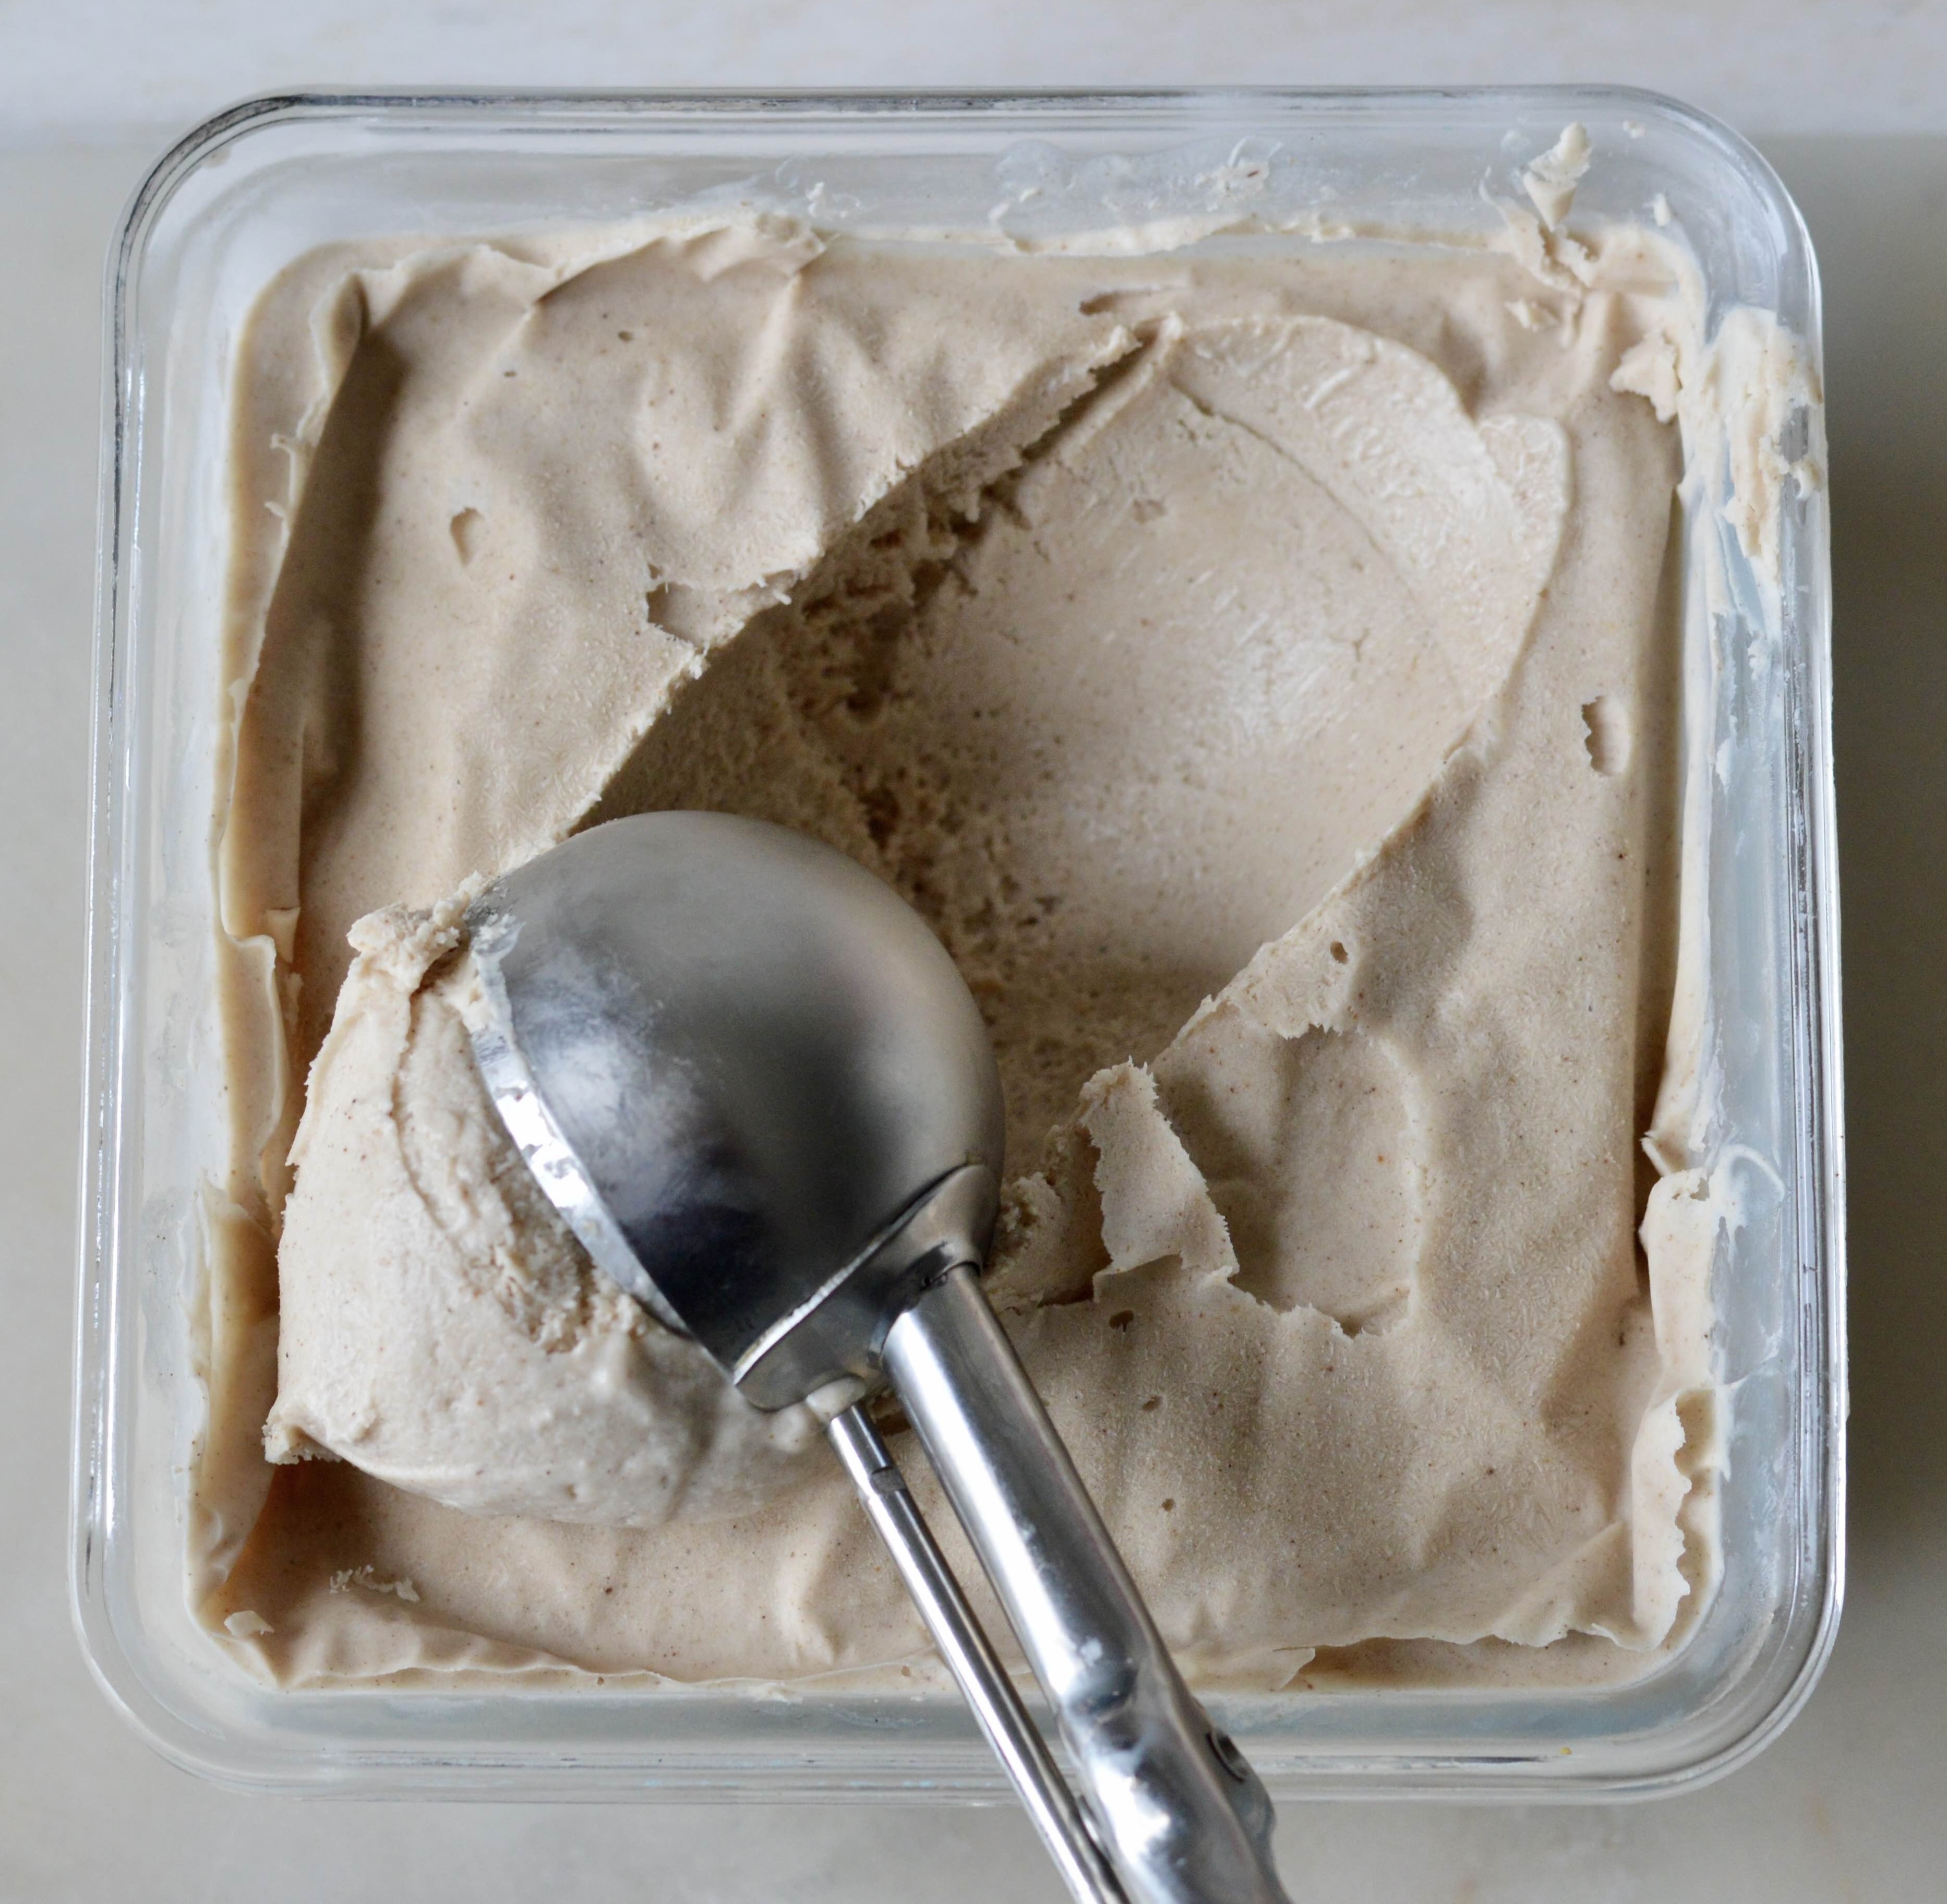
After the ice cream freezes for about 2-3 hours, you get this lovely soft-serve ice cream. After a good 4 hours in the freezer, the ice cream does get firmer, but is still scoop-able. And, later or the next day and the day after and after, it will be more frozen, but without ice crystals. So you have to let the container sit on the countertop for 15-20 minutes (or a bit more) prior to scooping out some creamy ice cream, which is fine because that is what I normally do with store-bought ice cream.
The step-by-step recipe for this Vegan Vanilla Ice Cream is below. A cinnamon version for the holiday season is also included.
Vegan Vanilla Ice Cream


- Makes 700 ml (3 cups) of cream
- Equipment: ice cream maker, high speed blender, kitchen thermometer, food scale
- Recommended ice cream makers for starters: the kitchenAid accessory or a separate machine.
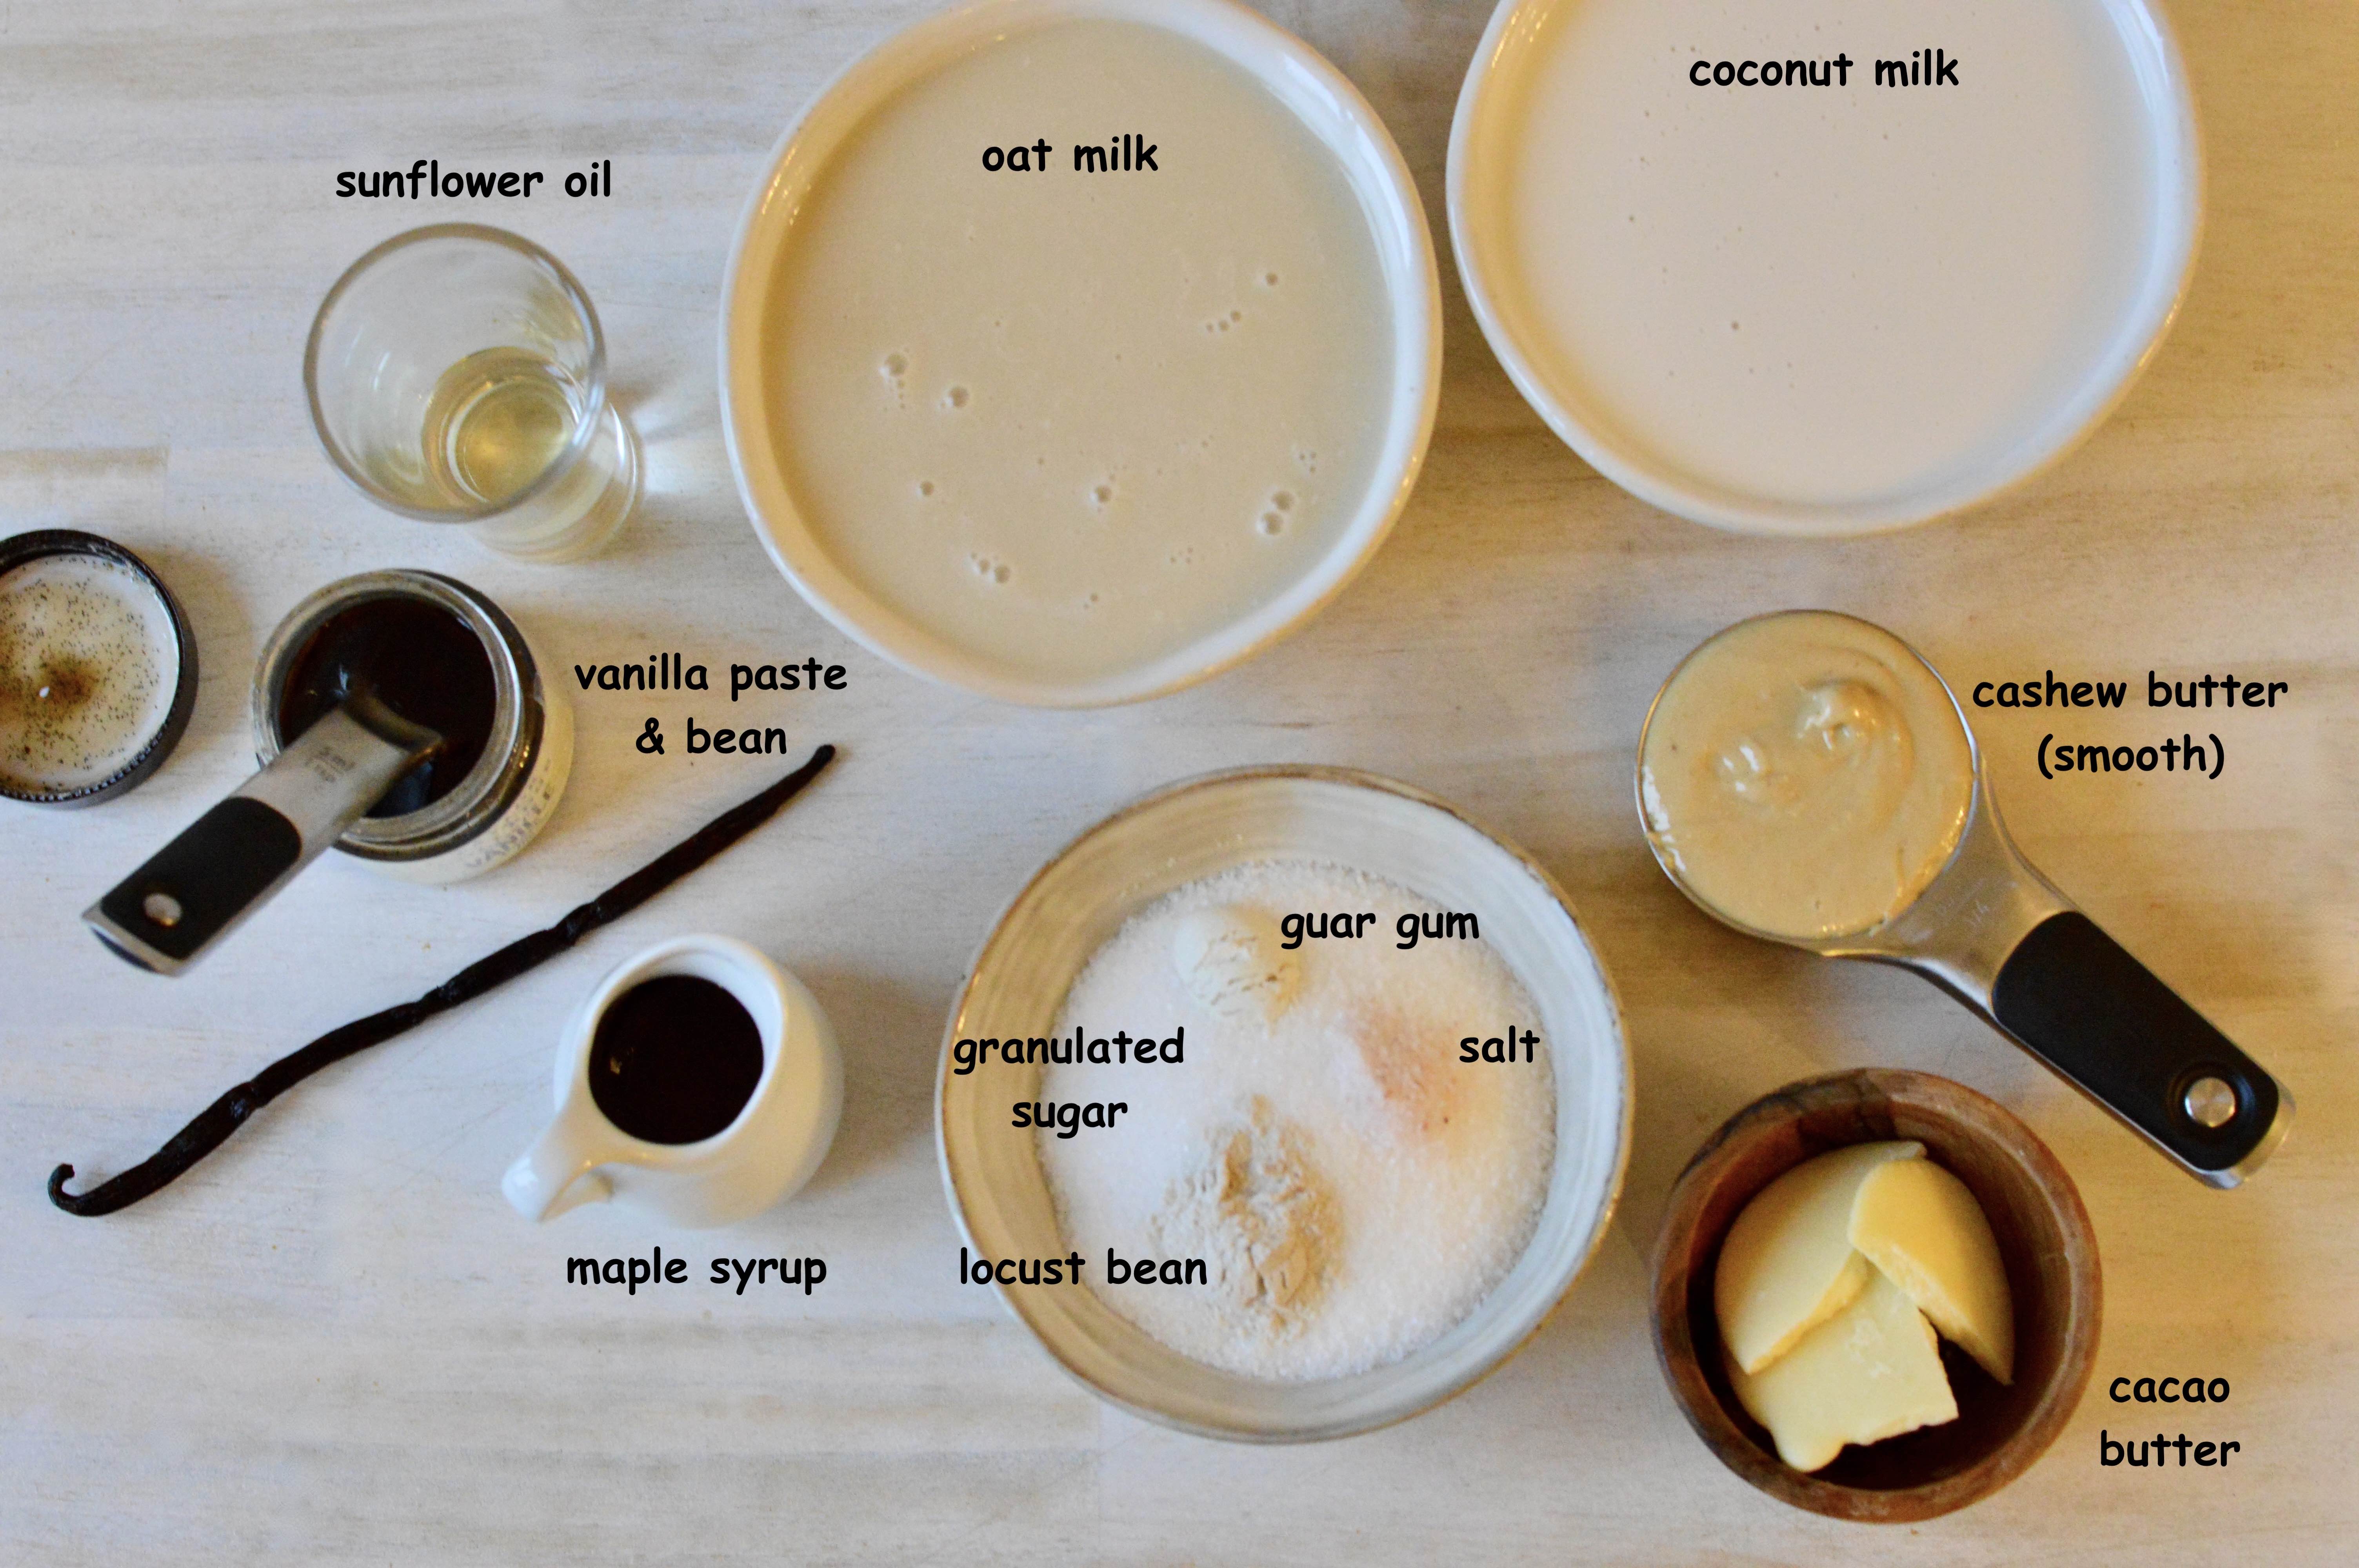
INGREDIENTS

A. Wet
- 300 ml (11/4 cup) oat milk, unsweetened (or almond / soy milk)
- 300 ml (11/4 cup) full fat coconut milk, a good quality brand
- 1/4 cup (70 gr) raw cashew butter, a smooth kind (or smooth almond butter)
- 15 gr raw cacao butter (e.g. this one or this one or this one or this one)
- 1 tablespoon (tbsp) sunflower oil
- 1 tbsp maple syrup
- vanilla seeds from 1 vanilla bean (option)
- 2 teaspoons (tsp) vanilla paste/ extract (preferably added after the cream has chilled in fridge) * see note 1
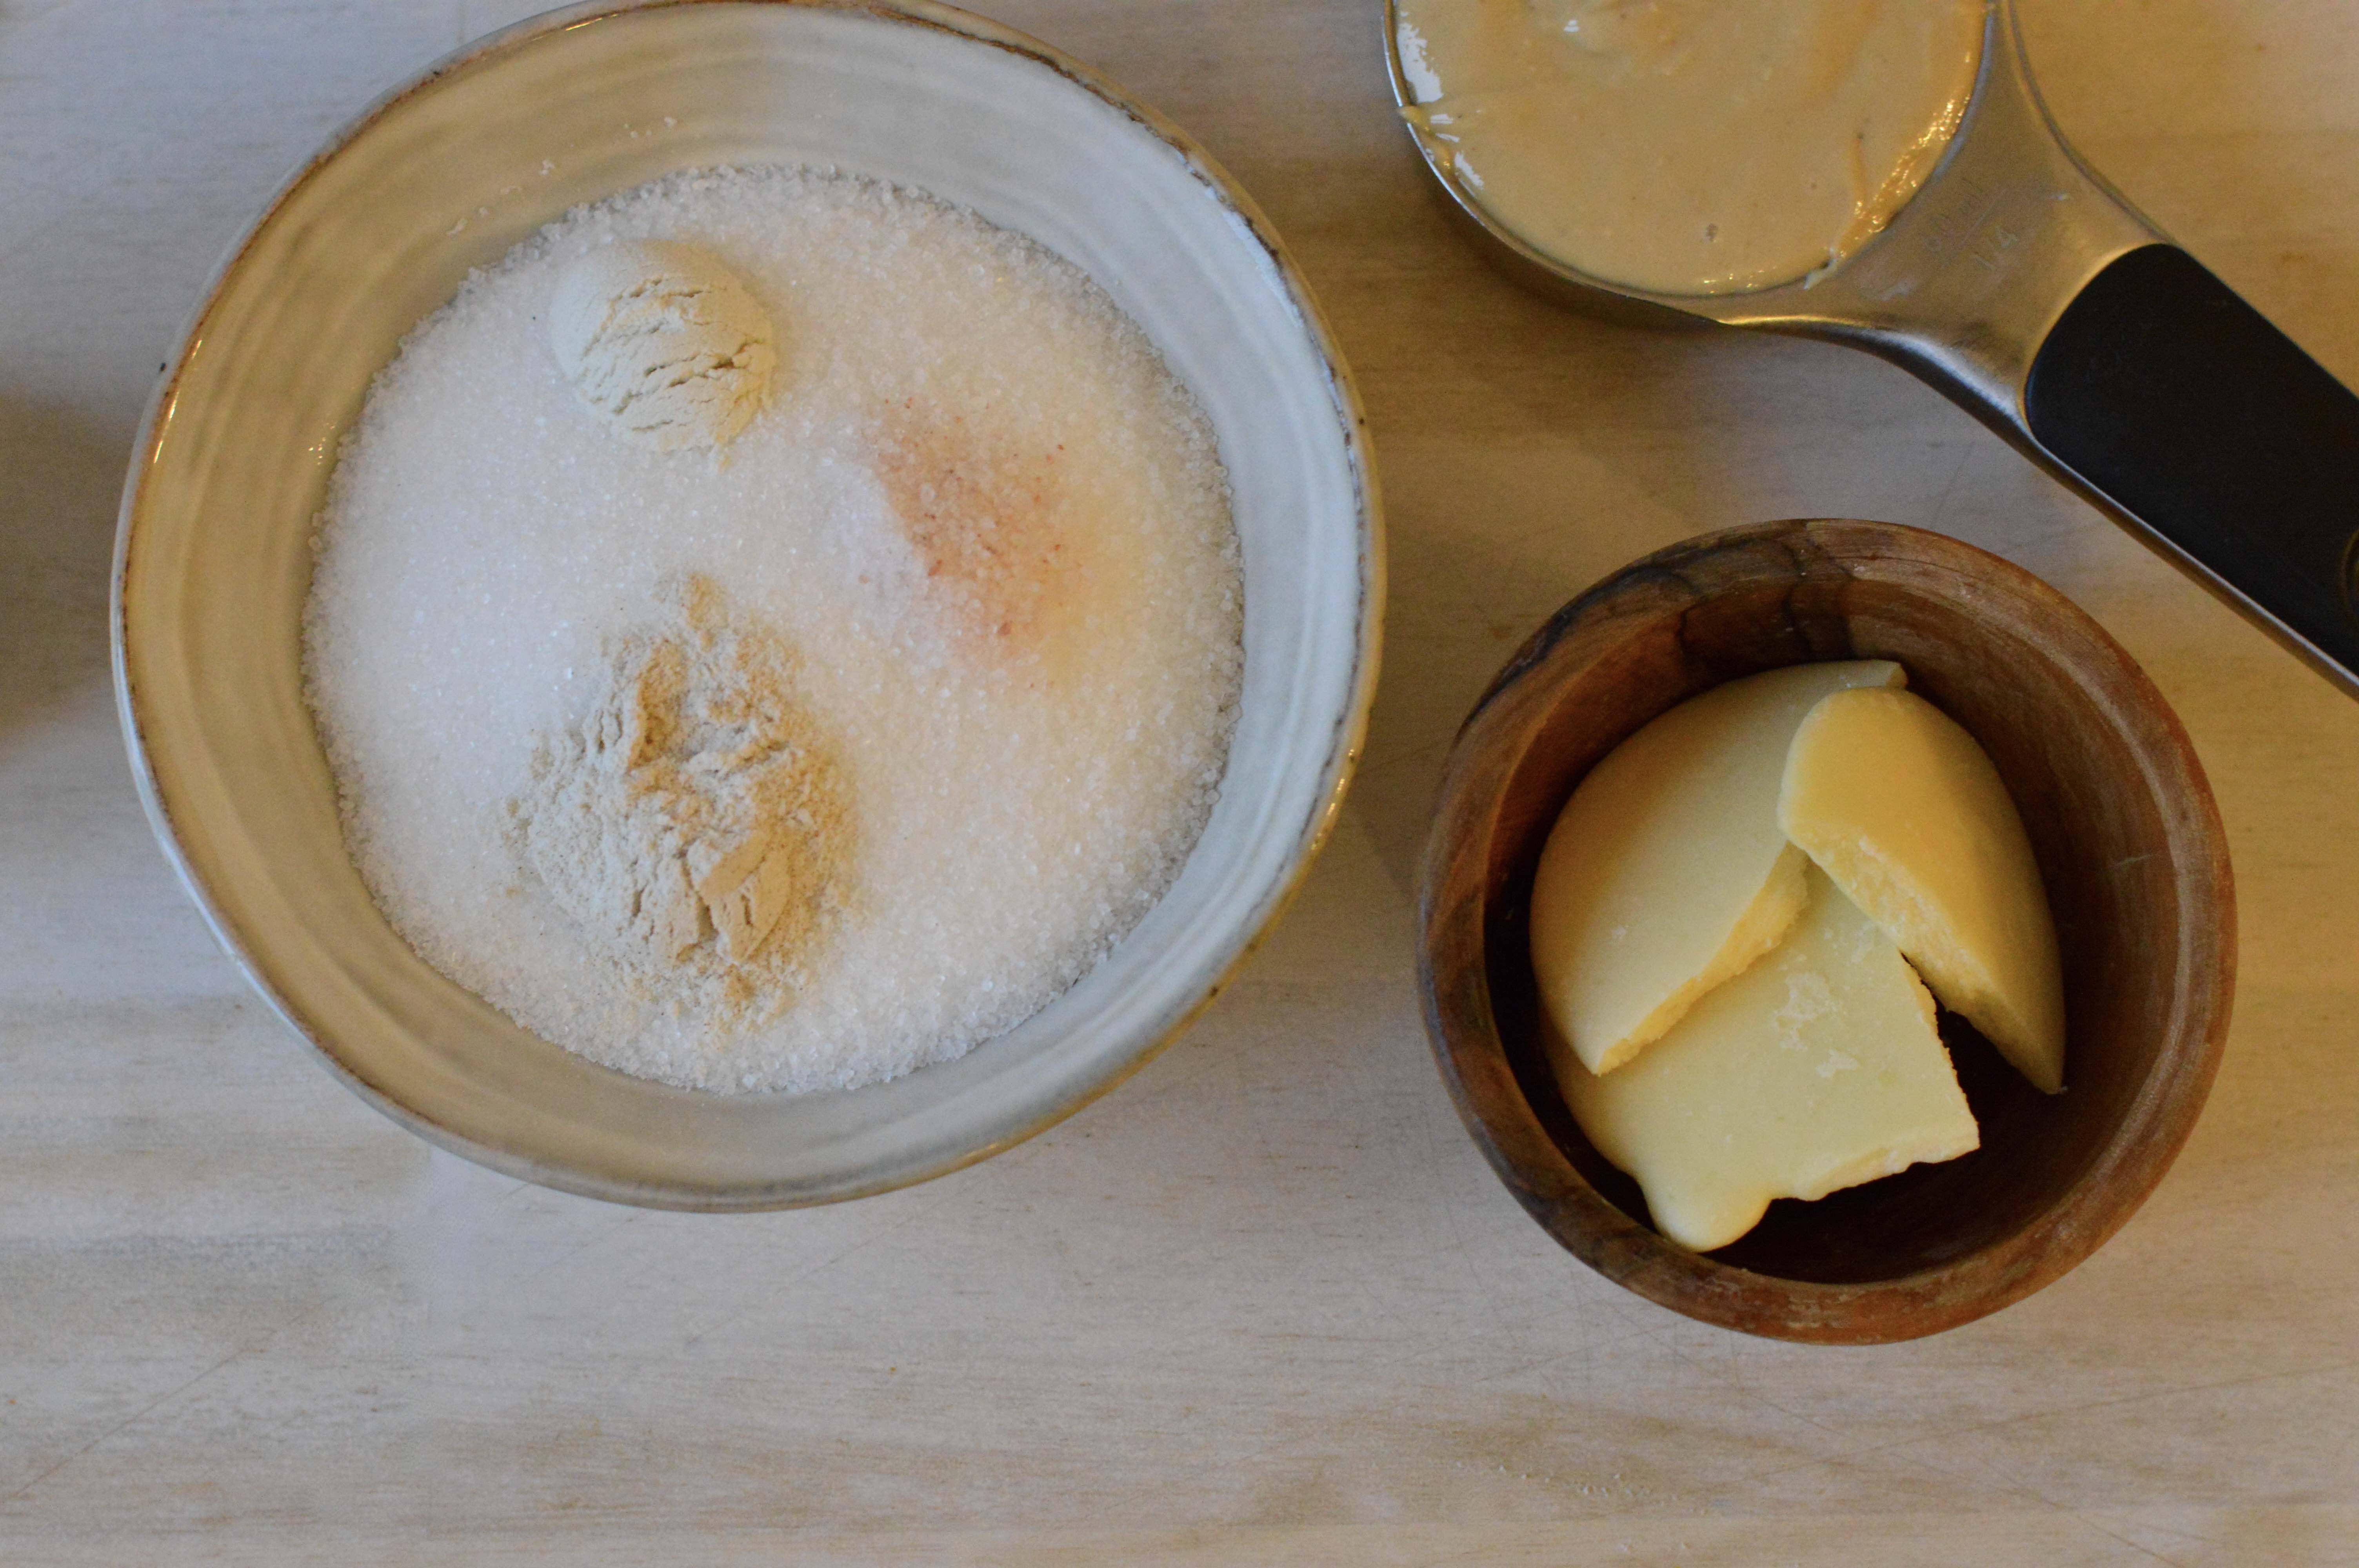
B. Dry
- 1/3 cup (80 gr ) granulated white sugar * see note 2
- 1/4 tsp salt
- Stabilisers: 1/2 tsp locust bean powder + 1/4 tsp guar gum
* Note 1 : Vanilla paste or extract contains alcohol and a bit of alcohol enhances creaminess, so I add the vanilla paste or extract after the cream has chilled; otherwise, the alcohol evaporates with heat.
* Note 2: Substituting the white granulated sugar with coconut, cane or brown sugar will alter the vanilla flavour and texture. Brown-coloured sugars have a higher moisture content than white sugar and can cause your stabilisers to clump up. I don’t recommend it.
PROCEDURE
- In a small bowl, mix the dry ingredients with a fork (sugar, salt & stabilisers). This is important because the stabilisers need to mix with the sugar to prevent clogging. Set this aside.
2. In a saucepan on stovetop add the oat and coconut milks, cashew butter, cacao butter, oil, maple syrup and vanilla seeds (if using). Heat this up on medium-low whisking constantly until the cacao and cashew butters have melted. (Do not bring the mixture to a boil).

3. When the butters have melted, add the dry ingredients (sugar, salt & stabilisers) and continue whisking over medium-low heat until your thermometer reaches 75°C (170°F) — at least before reaching 80°C (176°F). Reaching this temperature is necessary to activate the locust bean gum. Remove from heat.


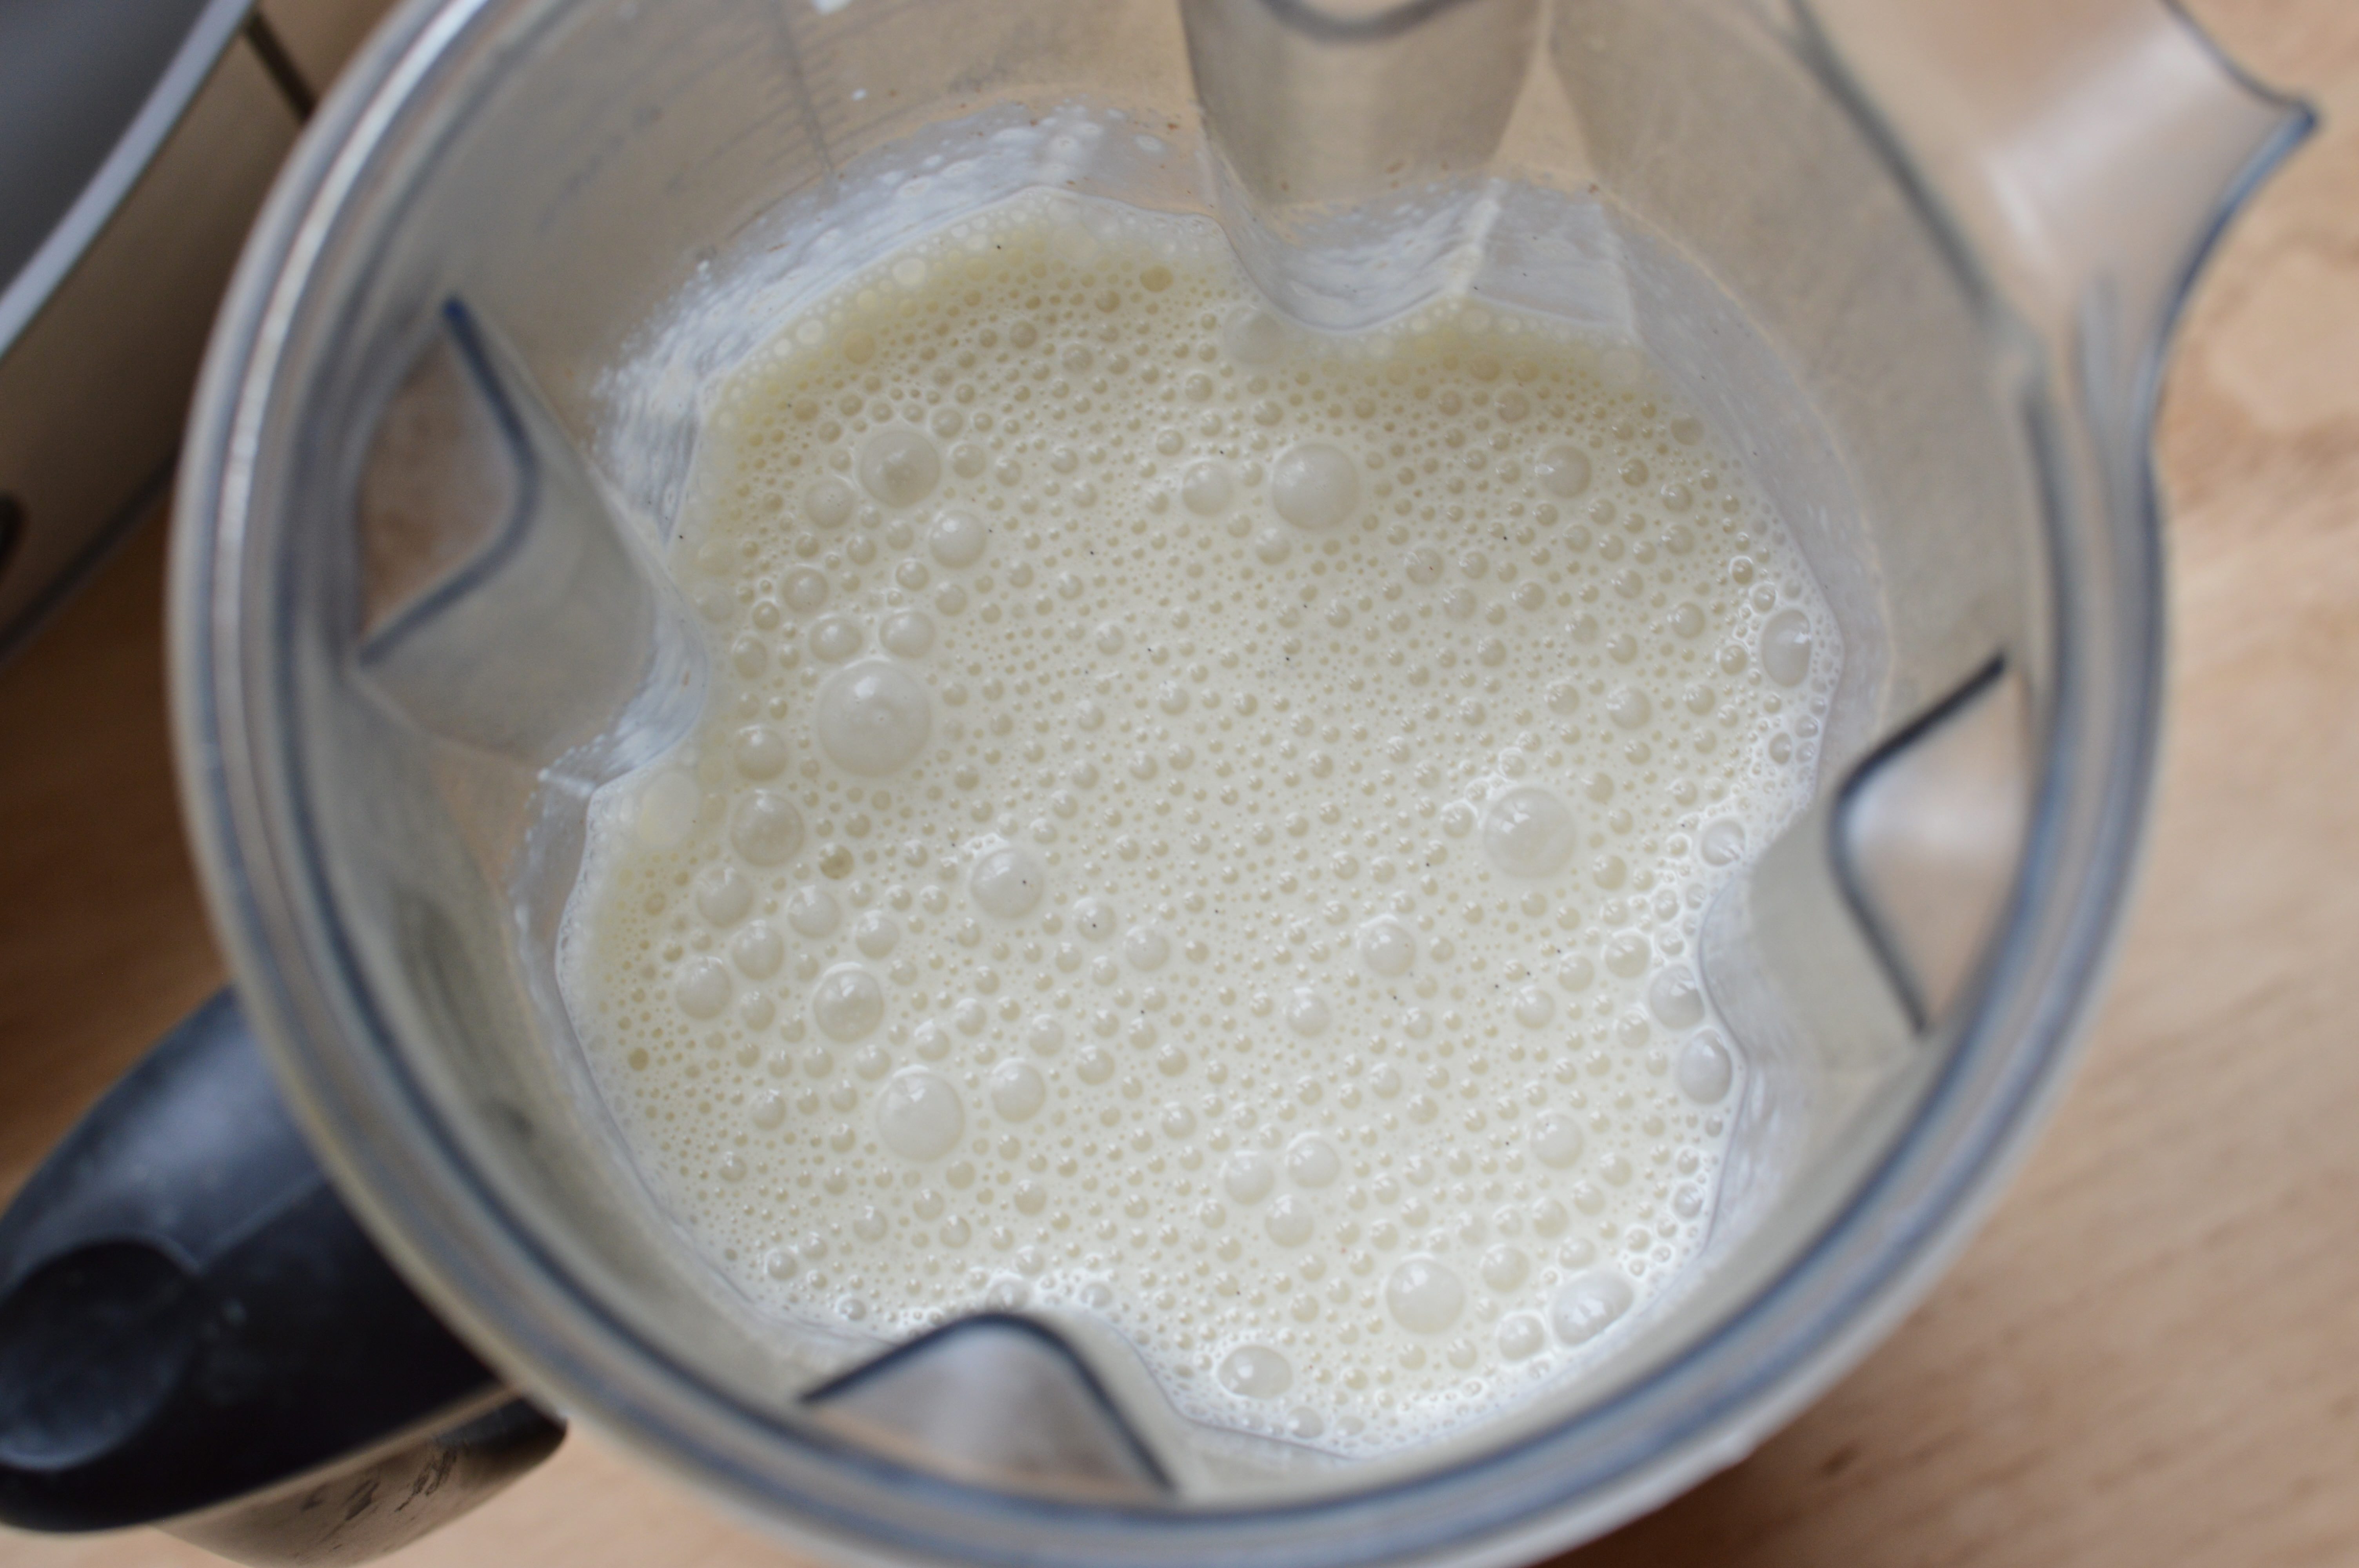
4. Pour the hot mixture into your high-speed blender and blend for 10-15 seconds to fully emulsify.
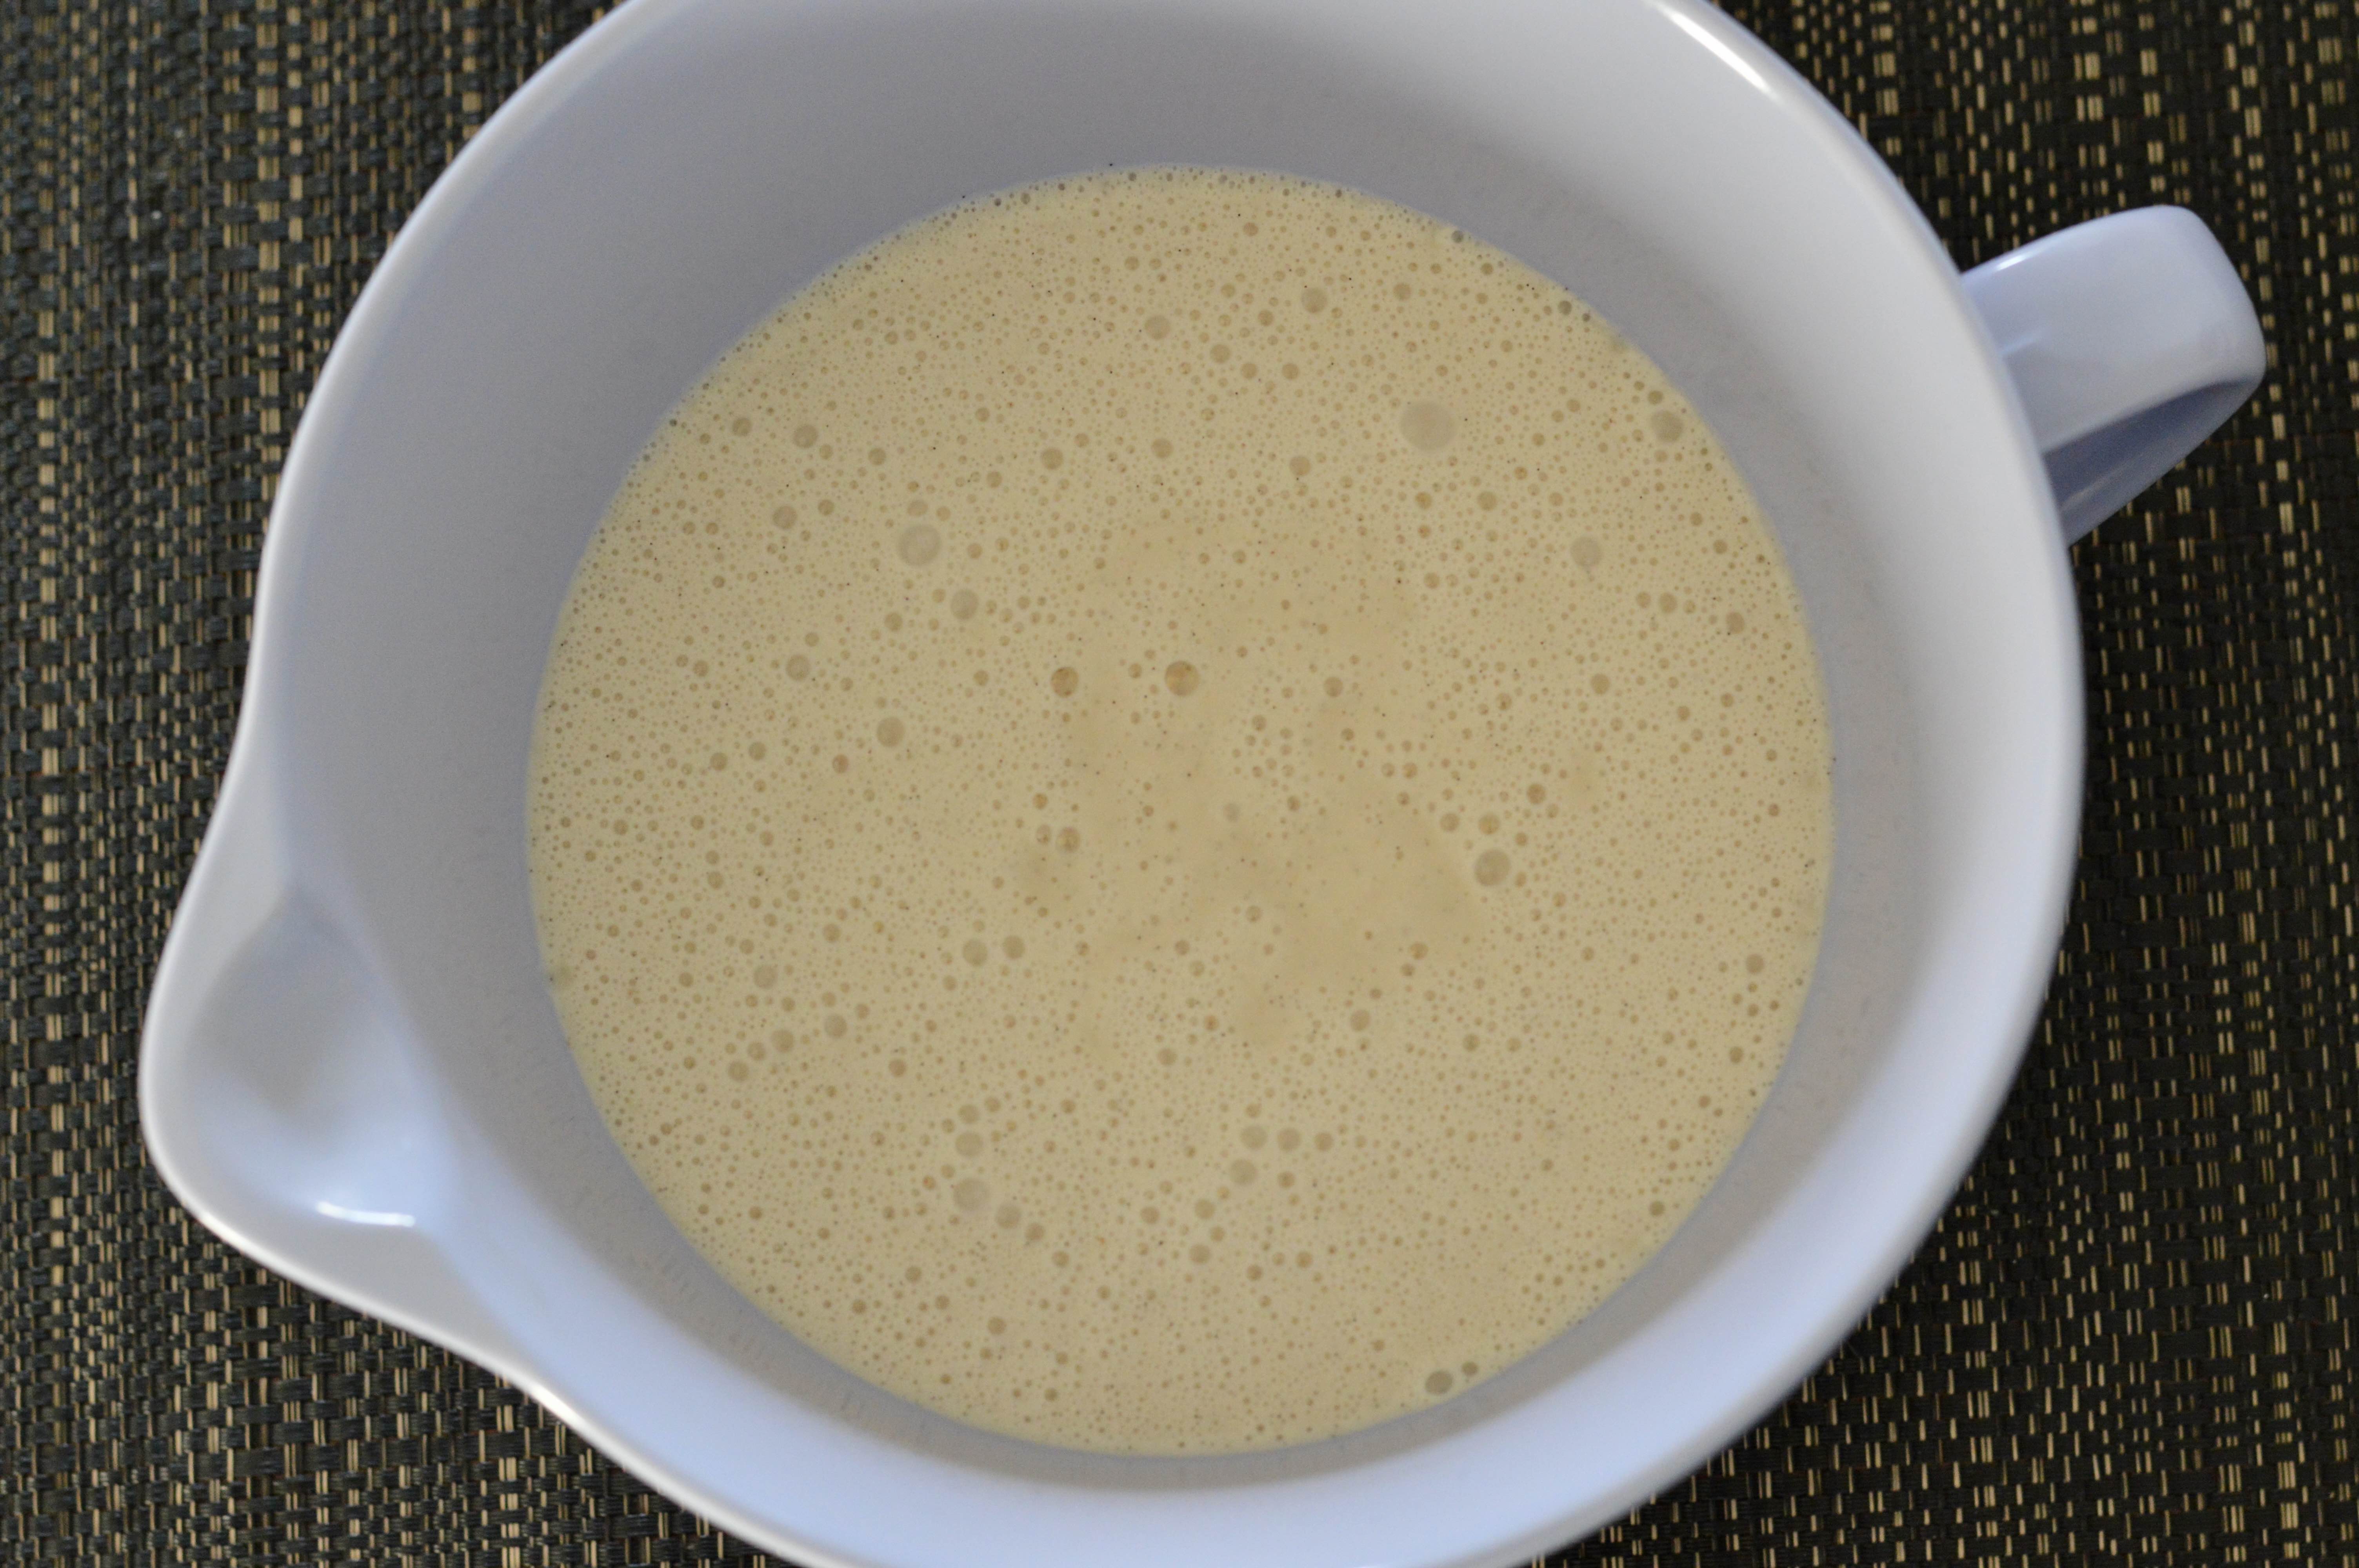
5. Transfer the mixture into a heat-proof container and let it cool uncovered on countertop to room temperature. Once cooled, cover ( I use foil topped with a plate) and place in the refrigerator to chill for at least 4 hours or overnight.
6. Prepare your ice cream maker according to manufacture’s instructions.
7. Add the vanilla paste or extract to the chilled cream mixture and mix with a fork or whisk (the cream will have gotten thicker, so mix well before churning). Turn on your machine. As the chilled container spins, slowly pour in the cream. Churn on low speed for 20 to 25 minutes, or until fluffy and it looks like soft-serve ice cream.

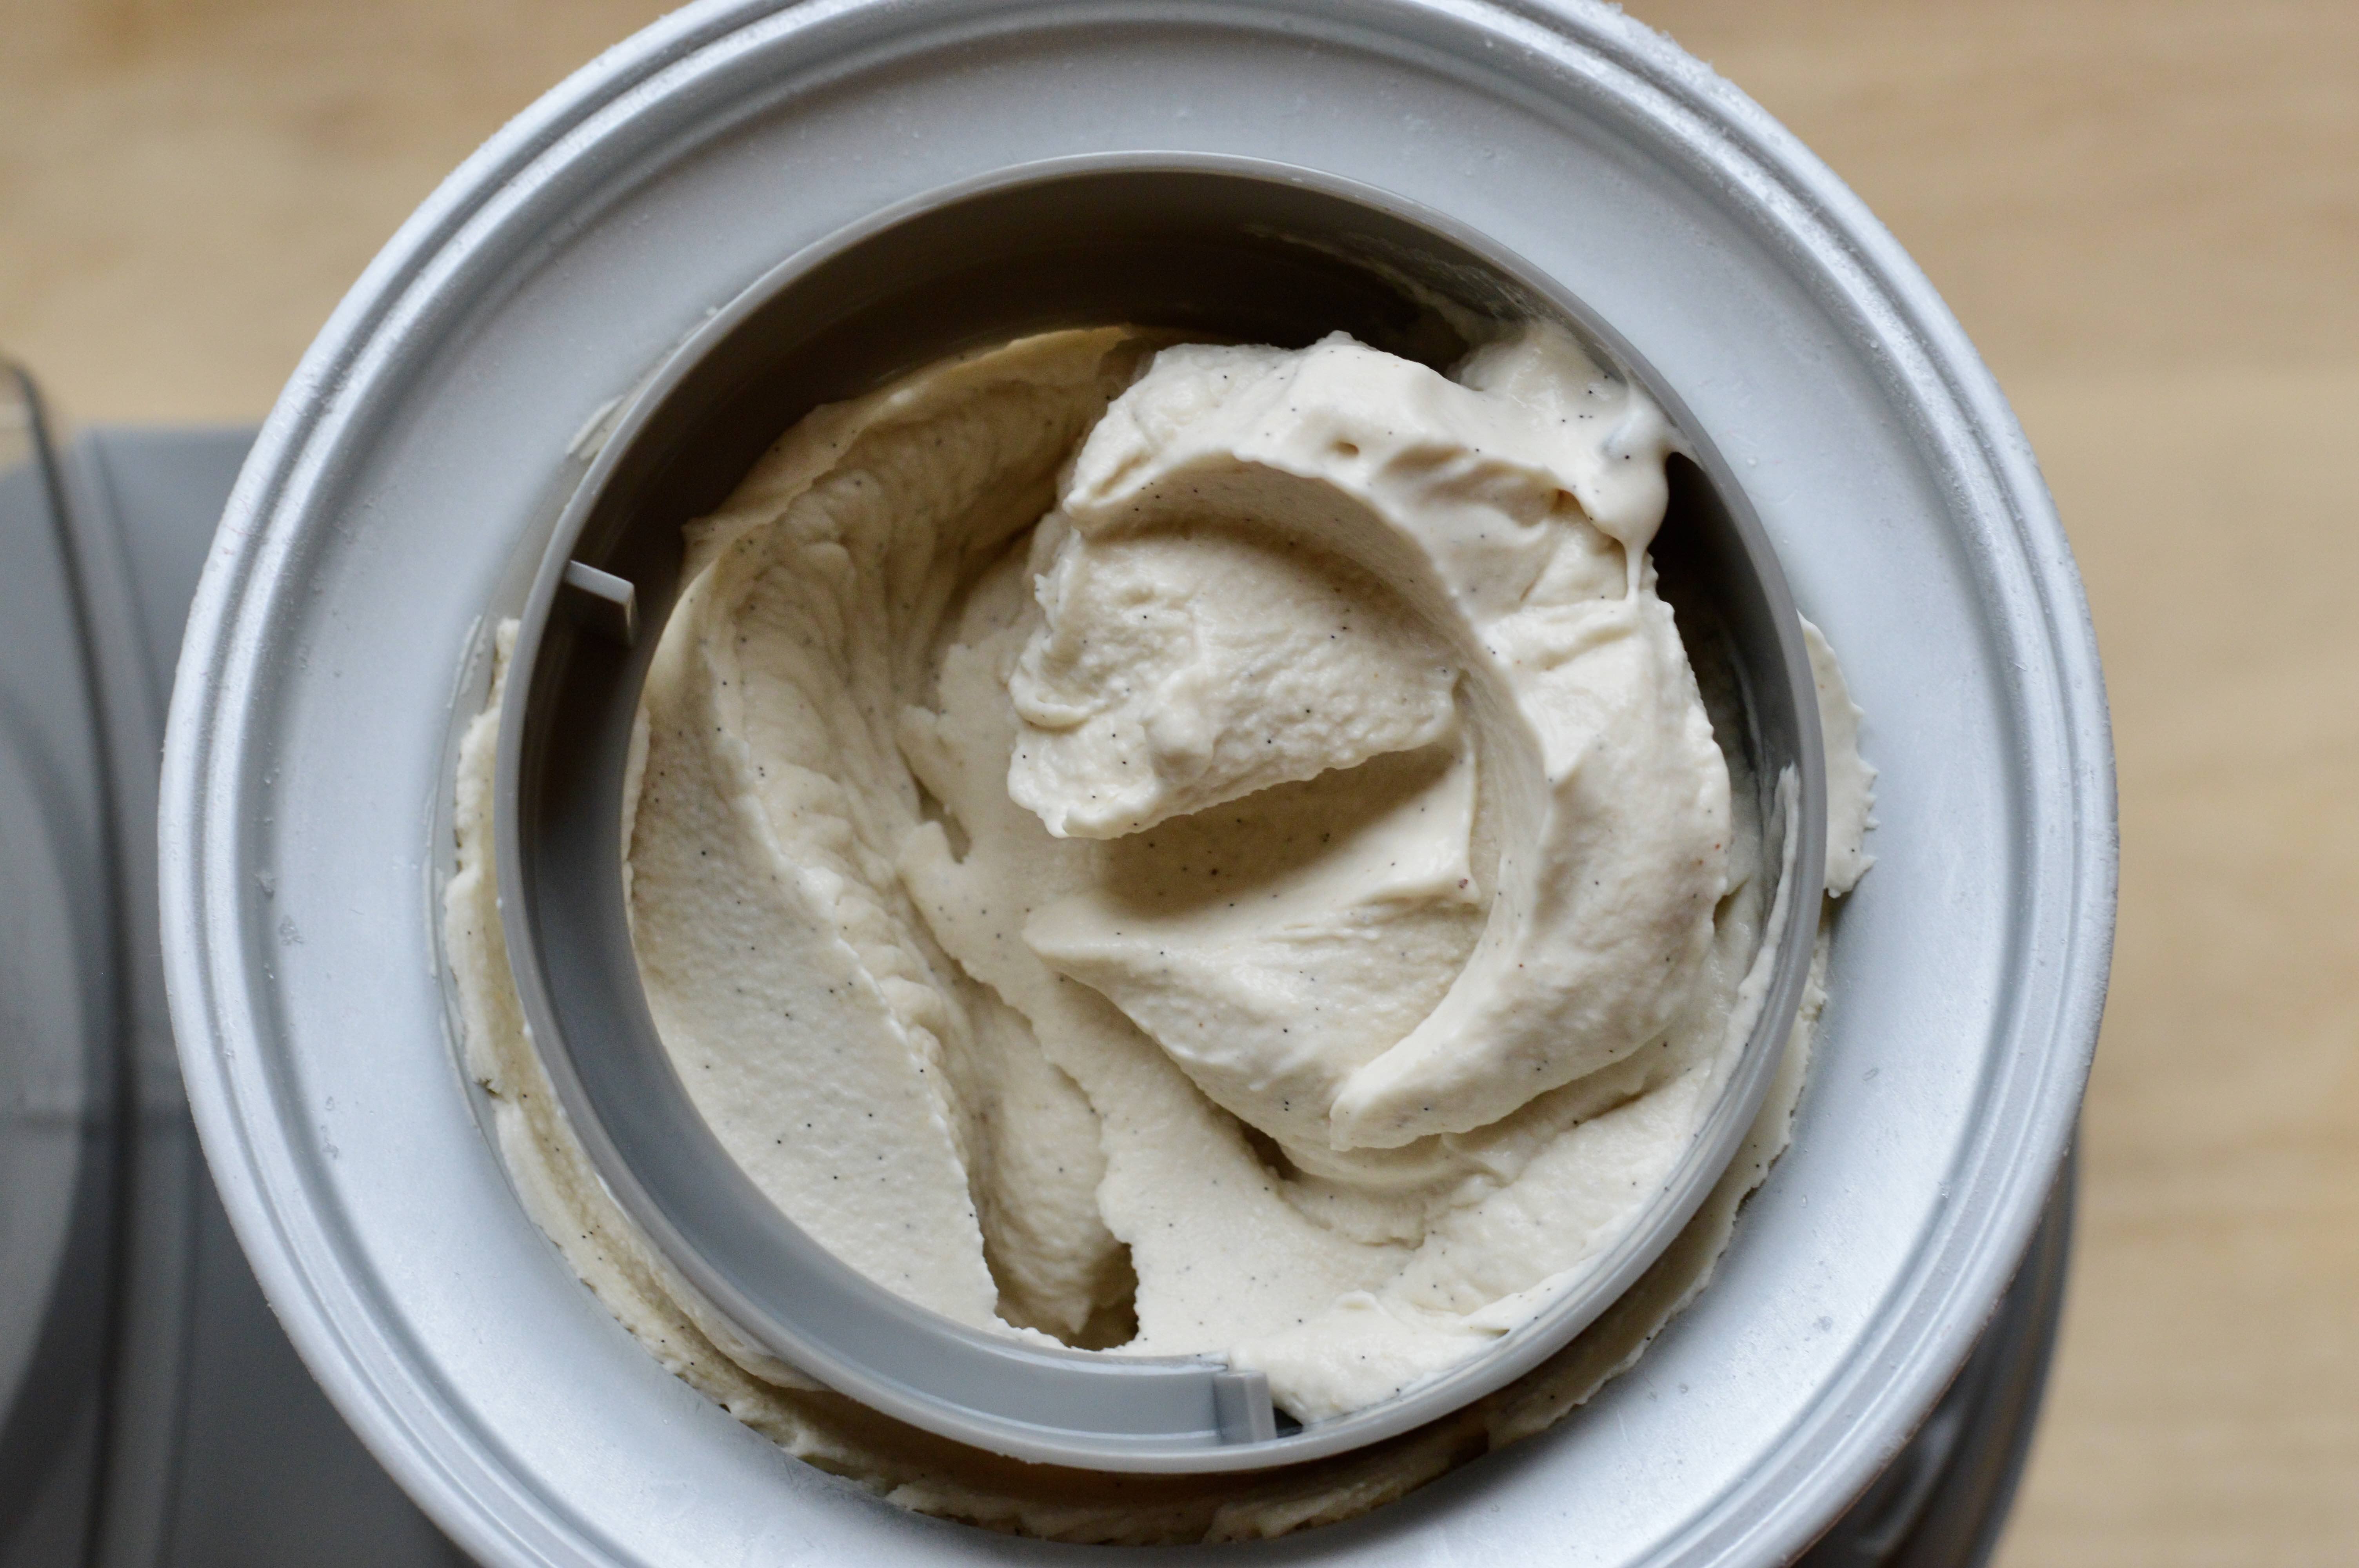
8. Transfer the churned cream into a freezer-safe container that fits a lid. Cover the top layer of the cream with a piece of waxed or parchment paper (optional) and seal with a lid. Freeze for 2-3 hours to enjoy soft-serve ice cream. After a good 4 hours in the freezer, the ice cream gets firmer. And, the next day and the day after, it will be more frozen (but without ice crystals), so just let the container sit on the countertop for 15-20 minutes prior to scooping out some cream.

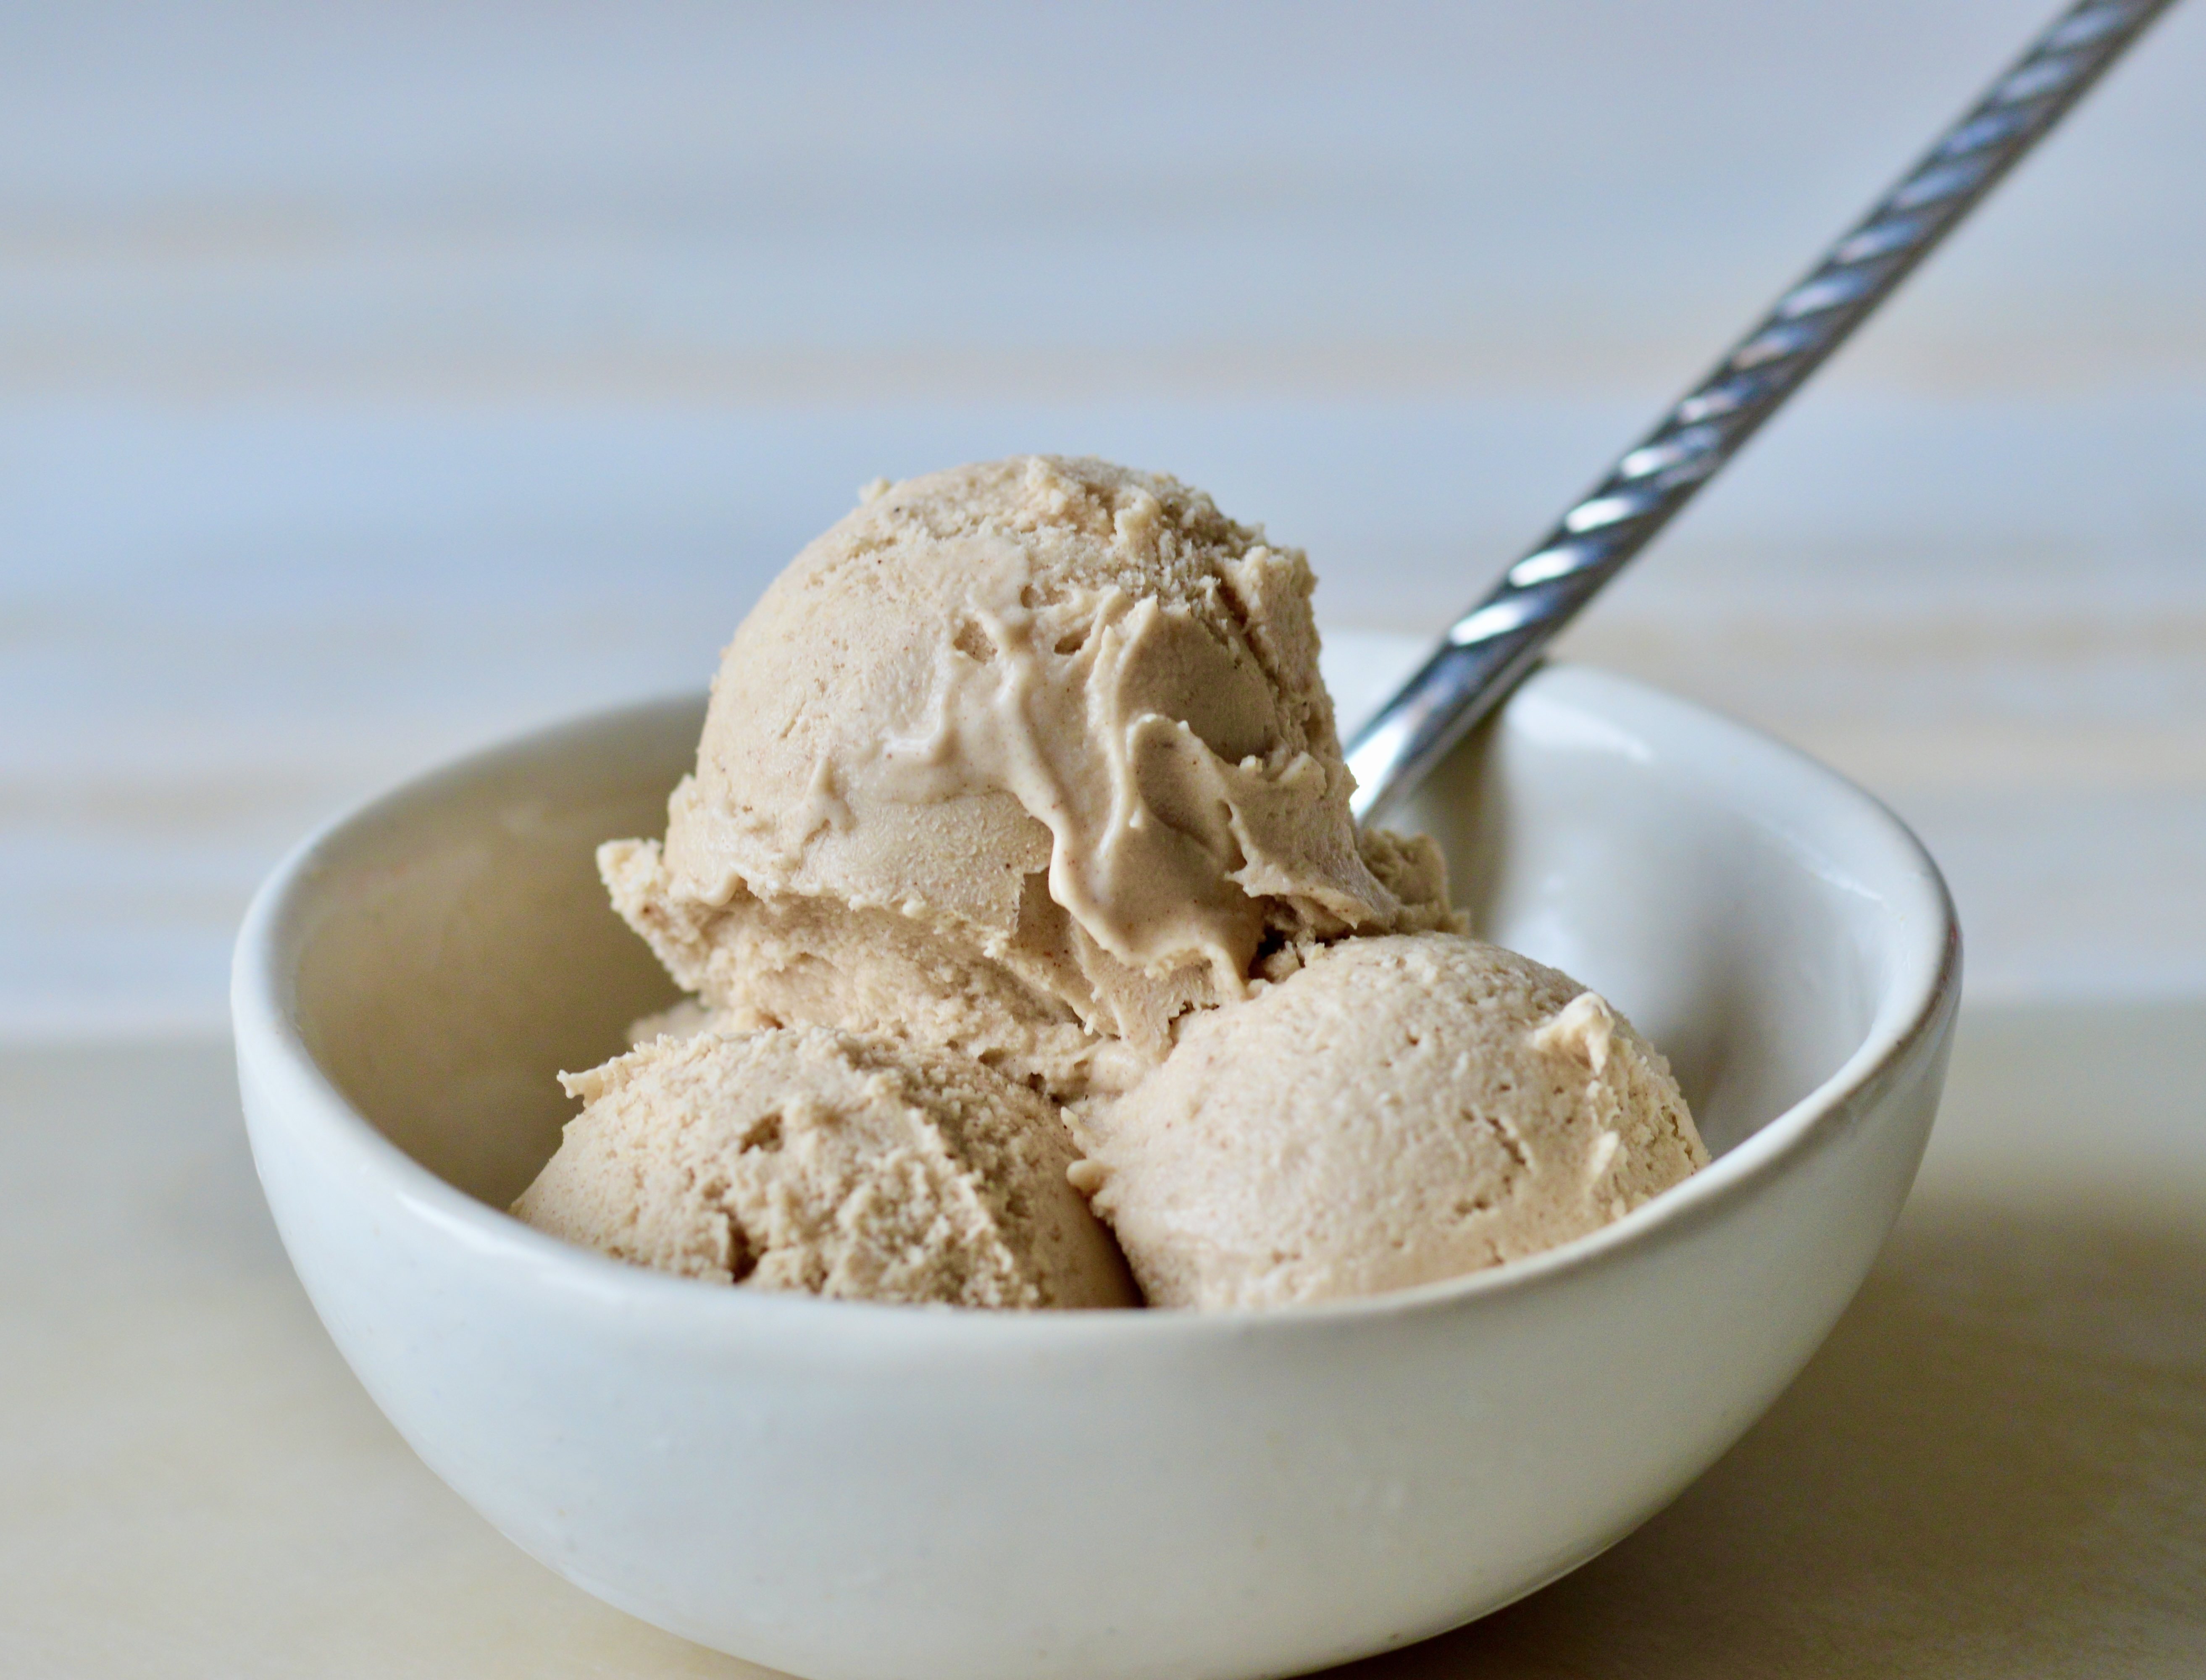
To make cinnamon ice cream
Ice cream is a popular summer dessert, but adding some winter spices, like powdered cinnamon and cardamom makes for a decadent treat during the holiday season.


Substitute the vanilla with 2 tsp ground cinnamon + 1/4 tsp ground cardamom and increase the coconut milk by 1 tbsp. Add the cinnamon and cardamom to the dry ingredients (sugar, salt + stabilisers) and mix with a fork. Proceed with recipe instructions above. Please, do not add any moist spices (e.g. vanilla bean seeds) to the dry ingredients since moisture can cause the stabilisers to clump. Anything moist or wet goes into the wet ingredients.
Enjoy!
Cherry or berry ice cream
Follow the steps in the Vanilla Ice Cream recipe above.
At step 7, prior to adding the cream to your ice cream maker, add the liquid vanilla to the chilled cream followed by a few handfuls of fresh or frozen cherries or berries (e.g. blueberries, raspberries, strawberries). Anywhere between 1 to 11/2 cups is good. I like to lightly mash them up with a potato masher before so that the fruit are slightly broken and juices are released. If using frozen, you can let them soften on countertop beforehand or in microwave for 10 seconds or more.
